Close Menu
  • Modern Home
    • Bedding & Sleep
      • Bed Linens
      • Mattress Guides
      • Royal Aesthetics
      • Sleep Hygiene
    • Home Decor & Styling
      • Color Palettes
      • Lighting Design
      • Minimalist Trends
      • Wall Colors & Art
    • Furniture & Cabinetry
      • Bedroom Furniture
      • Living Room Furniture
      • Custom Cabinetry
      • Dining & Kitchen
  • Creative Crafts
    • Sewing & Craft
      • Sewing Basics
      • Sewing Patterns
      • Sewing Projects
      • Fabric Guides
    • Embroidery
      • Hand Embroidery
      • Machine Embroidery
      • Embroidery Patterns
      • Stabilizers & Trims
    • Quilting
      • Quilting Basics
      • Quilt Patterns
      • Quilt Projects
      • Binding & Finishing
  • Tools & DIY
    • Home Improvement
      • DIY Repairs
      • Hardware Guides
      • Workshop Safety
      • Space Planning
    • Cleaning & Organization
      • Home Hacks
      • Organization Systems
      • Laundry Care
      • Storage Solutions
  • Buying Guides
    • Equipment & Machinery
      • Sewing Machines
      • Embroidery Machines
      • Quilting Machines
      • Sergers
    • Tools & Appliances
      • Large Appliances
      • Small Appliances
      • Power Tools
      • Thread & Notions
  • Company Info
    • Contact
    • Privacy Policy
    • Terms and Conditions
Facebook X (Twitter) Instagram Pinterest
Facebook X (Twitter) Instagram
CraftsingCraftsing
Sunday, November 15
  • Modern Home
    • Bedding & Sleep
      • Bed Linens
      • Mattress Guides
      • Royal Aesthetics
      • Sleep Hygiene
    • Home Decor & Styling
      • Color Palettes
      • Lighting Design
      • Minimalist Trends
      • Wall Colors & Art
    • Furniture & Cabinetry
      • Bedroom Furniture
      • Living Room Furniture
      • Custom Cabinetry
      • Dining & Kitchen
  • Creative Crafts
    • Sewing & Craft
      • Sewing Basics
      • Sewing Patterns
      • Sewing Projects
      • Fabric Guides
    • Embroidery
      • Hand Embroidery
      • Machine Embroidery
      • Embroidery Patterns
      • Stabilizers & Trims
    • Quilting
      • Quilting Basics
      • Quilt Patterns
      • Quilt Projects
      • Binding & Finishing
  • Tools & DIY
    • Home Improvement
      • DIY Repairs
      • Hardware Guides
      • Workshop Safety
      • Space Planning
    • Cleaning & Organization
      • Home Hacks
      • Organization Systems
      • Laundry Care
      • Storage Solutions
  • Buying Guides
    • Equipment & Machinery
      • Sewing Machines
      • Embroidery Machines
      • Quilting Machines
      • Sergers
    • Tools & Appliances
      • Large Appliances
      • Small Appliances
      • Power Tools
      • Thread & Notions
  • Company Info
    • Contact
    • Privacy Policy
    • Terms and Conditions
CraftsingCraftsing
Home»Sewing & Craft»Can You Put an Iron On Patch on Polyester? The Safe 2026 Method
Sewing & Craft

Can You Put an Iron On Patch on Polyester? The Safe 2026 Method

MithuBy MithuUpdated:November 7, 20269 Mins Read
iron on patch polyester hero
Share
Facebook Twitter LinkedIn Pinterest Email
Table of Contents Toggle
  • Can You Iron a Patch Onto Polyester? The Short Answer
  • Step 1: Check the Label Before You Touch the Iron
  • Step 2: Understand the Gap Between the Glue and the Fabric
  • Step 3: Pick a Patch That Can Survive Polyester
  • Pressing Setup: Cloth On, Steam Off
  • Step 4: Set Up With a Press Cloth and No Steam
  • Step 5: Press in Short Bursts Instead of One Long Hold
  • Step 6: Press the Back of the Garment to Lock the Bond
  • Heat Press vs Iron for Polyester Patches
  • Step 7: Choose the Alternative When Heat Is the Wrong Tool
  • Step 8: Wash It the Way the Bond Needs
  • When It Peels Anyway: The Five Failures
  • Frequently Asked Questions
  • Conclusion
  • About This Guide

Can You Put an Iron On Patch on Polyester? The Safe 2026 Method

Yes, you can put an iron on patch on polyester, but only with a press cloth, no steam, and short presses: the patch glue needs about 150C while a polyester care label caps ironing at 110C, so press 10 to 15 seconds at a time on the lowest setting and check the bond before continuing.

Can You Iron a Patch Onto Polyester? The Short Answer

Yes, you can put an iron on patch on polyester, and the bond can last, but only with three safeguards: a cotton press cloth over the patch, no steam, and short presses on the lowest iron setting. The danger is the gap between two numbers: most iron-on adhesive activates around 150C, while a polyester care label with one dot caps ironing at 110C. You bridge that gap with cloth, time and checking rather than a hotter iron.

Step 1: Check the Label Before You Touch the Iron

Polyester care label with one-dot iron symbol meaning 110C max
Close-up of a polyester care label showing the one-dot iron symbol at 110C

Read the garment label first. One dot on the iron symbol means synthetic, low heat, 110C maximum; two dots mean 150C and three mean 200C. Polyester and most blends carry one or two dots. If the label says dry clean only or do not iron, skip heat entirely and use a sewn or glued patch instead.

Iron symbolMax temperatureSafe for this patch job
One dot110CYes, with press cloth and short presses
Two dots150CYes, glue activates fully
Three dots200CYes, but watch for shine
Crossed ironDo not ironNo, use sew-on or glue

Step 2: Understand the Gap Between the Glue and the Fabric

Patch cross-section showing adhesive film under the twill
Cross-section diagram of an embroidered patch showing twill base and heat-seal adhesive film

Iron-on backing is a thermoplastic adhesive film. It melts around 130 to 150C, flows into the fabric weave under pressure, and hardens again as it cools. Polyester fibers soften and can melt or go shiny above about 150C, and scorch even lower with direct soleplate contact. So the working window is narrow: enough heat to melt the glue, never enough to damage the fiber, and the press cloth plus short bursts keep you inside it.

Step 3: Pick a Patch That Can Survive Polyester

Embroidered, woven and printed patches compared on polyester
Three patch types on grey polyester: embroidered, thin woven and flexible printed patch

Thin, flexible patches with a light adhesive layer bond best on polyester; thick embroidered patches with heavy glue need more heat than the fabric can take. Check the patch packaging for a recommended temperature and fabric list, and avoid patches labeled for cotton-only if the garment is polyester.

Pressing Setup: Cloth On, Steam Off

Video note: this Brother support video shows basic pressing and stitching setup on a machine; the heat-care habits apply to pressing patches, but the video itself is a general machine demo rather than a patch tutorial. Channel: @BrotherSupportSewing.

Set the iron to the lowest setting that still matches the one-dot label, usually synthetic or low. Lay a clean cotton press cloth over the patch, never press the soleplate directly on the patch threads, and turn the steam off completely; steam adds moisture and scorch risk on synthetics.

Step 4: Set Up With a Press Cloth and No Steam

Press cloth over the patch with a dry iron ready
Cotton press cloth laid over a patch on a polyester jacket with a dry iron beside it

Preheat the fabric for a few seconds through the cloth first, place the patch adhesive-side down, cover with the cloth, and press firmly. The cloth spreads heat evenly, keeps the soleplate off the embroidery, and absorbs any shine before it sets.

Step 5: Press in Short Bursts Instead of One Long Hold

Iron lifted after a 15 second press burst
Iron lifted clear of a pressed patch on polyester with a small timer beside it

Press for 10 to 15 seconds, lift the iron, let the spot cool a few seconds, then press again, moving to a new spot each time. Total heat matters more than continuous heat, and lifting lets you check the bond before damage builds. Never leave the iron resting on one spot.

Step 6: Press the Back of the Garment to Lock the Bond

Pressing the reverse side of the patch
Polyester jacket inside out on an ironing board with the iron pressing the reverse of the patch

Turn the garment inside out and press the back of the patched area through a cloth for another 10 to 15 seconds. This drives the adhesive through the weave from the other side and is the step that most often decides whether the patch survives washing. Let it cool completely before you touch it; the bond sets as it cools.

Heat Press vs Iron for Polyester Patches

Video note: this Brother support video shows how to adjust settings such as temperature-equivalent stitch controls on a machine; use the idea of fixed, tested settings for your iron too, but it is not a heat-press tutorial. Channel: @BrotherSupportSewing.

A household iron works if you follow the bursts above. A mini heat press gives even pressure and a set temperature and timer, which removes the guesswork on the 150C versus 110C gap, and is the better tool if you patch jackets, bags or uniforms regularly. Whichever you use, keep the press cloth and the short-cycle habit.

If a household iron keeps scorching or under-bonding your patches, a small heat press gives even heat and a real temperature readout: the Cricut EasyPress Mini heat press is built for exactly this kind of small patch work. The same EasyPress Mini is worth adding if you patch often.

Mini heat press machine open beside a patch on a craft table
A small mini heat press open on a craft table next to a patch and a polyester garment

Step 7: Choose the Alternative When Heat Is the Wrong Tool

If the label says do not iron, or the fabric is coated, waterproof or delicate, skip heat. Sew the patch on with a tight backstitch around the border (see How To Sew on a Patch and How to Sew on a Patch by Hand: 7 Steps From Pin to Press), use a strong fabric glue for a no-sew bond, or pick a peel-and-stick patch. For mending first, How to Sew a Hole: 6 Steps From Snag to Patch shows how to close the hole before patching.

Step 8: Wash It the Way the Bond Needs

Patched jacket air drying after a cold wash
Patched polyester jacket hanging to air dry beside a laundry basket

Wash cold, inside out, on a gentle cycle, no fabric softener, and air dry or tumble on cool. Heat in the dryer re-softens the adhesive and is the most common reason a patch peels after a few washes. Most patch failures are laundry failures.

PLANTIONAL Upholstery Repair Sewing Kit: 47 Pieces Heavy Duty Sewing Kit with Sewing Awl, Seam Ripper, Leather Hand Sewing Stitching Needles, Sewing Thread for Car, Sofa, Backpack, Shoe, Craft DIY
Amazon.com
PLANTIONAL Upholstery Repair Sewing Kit: 47 Pieces Heavy Duty Sewing Kit with Sewing Awl, Seam Ripper, Leather Hand Sewing Stitching Needles, Sewing Thread...
BUY NOW
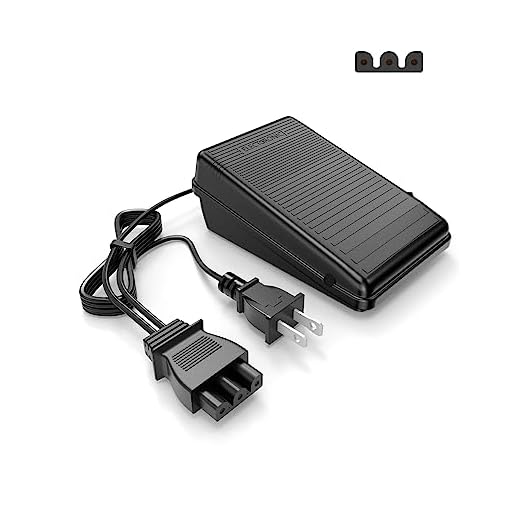
Foot Pedal Power Cord Replacement for Singer Sewing Machine, D Shape Plug Compatible with Singer 4452 4443 4432 4423 4411 44S 5554 5532 5523 5511 160s 150s 140s 130s(359102-001)
Amazon.com
Foot Pedal Power Cord Replacement for Singer Sewing Machine, D Shape Plug Compatible with Singer 4452 4443 4432 4423 4411 44S 5554 5532 5523 5511 160s 150s...
BUY NOW
Sewing Machine Bobbin Case Stainless Steel Bobbin Case for Front Loading 15 Class Machines Suitable for Household Sewing
Amazon.com
Sewing Machine Bobbin Case Stainless Steel Bobbin Case for Front Loading 15 Class Machines Suitable for Household Sewing
BUY NOW
CKPSMS Brand-Universal sewing machine motor stretchable belt with the perimeter ranging from 13"(330mm)to 15"(380mm) and diameter 3/16"(5mm) Compatible with SINGER brand household Sewing Machine(2PCS)
Amazon.com
CKPSMS Brand-Universal sewing machine motor stretchable belt with the perimeter ranging from 13"(330mm)to 15"(380mm) and diameter 3/16"(5mm) Compatible with...
BUY NOW

When It Peels Anyway: The Five Failures

A lifting patch corner being pressed back into place
Lifting corner of a patch on a dark polyester sleeve being pressed back down

A lifting corner tells you which check failed. Run through these five: the iron was too hot and glazed the glue; there was no press cloth so the soleplate marked the threads; the press was one long hold instead of bursts; the back was never pressed; or the garment went through a hot wash or dryer. Re-press through a cloth in bursts on both sides for a small lift; re-glue or sew the border for a bigger one.

  • Shiny or glazed patch: heat too high, use cloth and lower setting
  • Edges lifting: re-press both sides in 10 second bursts
  • Whole patch loose: adhesive never fully melted, re-press longer
  • Peels after washing: dryer heat or softener, switch to air dry
  • Fabric scorched: iron touched fabric directly, use cloth always

Frequently Asked Questions

Can you put an iron on patch on polyester? Yes, with a cotton press cloth, no steam, the lowest iron setting, and 10 to 15 second presses. Never press the soleplate directly on the patch.

What temperature does patch glue need? Most iron-on adhesive activates around 130 to 150C, which is why two-dot cotton settings often work better than one-dot synthetic settings, but always protect polyester with a cloth.

What does one dot on the iron symbol mean? Low heat, about 110C maximum, intended for synthetics like polyester and nylon.

Should I use steam when ironing a patch on polyester? No. Steam adds moisture and scorch risk on synthetics; use a dry iron with a press cloth.

How long should I press an iron-on patch? 10 to 15 seconds per burst, lifting the iron between bursts, then 10 to 15 seconds on the back of the garment.

Is a heat press better than an iron for patches? For small patches an iron with a cloth is fine; a mini heat press gives even heat and a set timer, which helps on polyester where the safe window is narrow.

Why did my patch peel after washing? Usually hot water, fabric softener or a hot dryer re-softened the glue. Wash cold inside out and air dry.

Can I patch polyester that says do not iron? Yes, with a sewn-on patch or fabric glue; skip heat entirely.

Conclusion

You can put an iron on patch on polyester safely: read the label, use a press cloth and a dry iron on the lowest setting, press in 10 to 15 second bursts, lock the bond from the back, and wash cold and air dry. The whole method exists to bridge one gap, the 150C glue against the 110C label, and short bursts through a cloth do it without shine, scorch or a peeling patch.

About This Guide

This guide was prepared by the CraftSing editorial team and checked against garment care labeling conventions and manufacturer adhesive guidance. For fabric, thread and needle compatibility when sewing on a patch instead, see the manufacturer reference chart from Brother: Brother fabric and needle chart. Product mentions are based on publicly available ratings and specifications at the time of writing.


FTC disclosure: CraftSing may earn a commission when you buy through affiliate links on this page, at no extra cost to you. This does not influence our recommendations.

All images in this article were created using AI.

Share. Facebook Twitter Pinterest LinkedIn WhatsApp Reddit Tumblr Email

Related Posts

How to Sew on a Patch by Hand: 7 Steps From Pin to Press

June 26, 2026

Sew a Stunning Swing Tunic: Your Simple Step-By-Step Guide

April 25, 2026

Sew a Stunning Flutter Hem Pencil Skirt: A Simple Step-By-Step Guide

April 22, 2026
Leave A Reply Cancel Reply

Our Picks

How to Sew an Oversized Sweatshirt Dress Even If You’ve Never Sewn Before

Master Fabric Cording Techniques: Transform Ordinary Fabrics Into Extraordinary Art

How Do You Sew a Pillowcase? Unlock the Secret To Cozy Handcrafted Bliss

Master Your Claire Wrap Dress: 5 Essential Pattern Adjustments for a Perfect Fit

Stay In Touch
  • Facebook
  • Twitter
  • Pinterest
  • Instagram
Don't Miss
Sewing Machines

Do All Sewing Machines Have Foot Pedals? 7 Checks

Not all machines need a pedal. Seven checks tell you if yours runs without one, from the socket and the start button to a knee lever and a treadle

Embroidery Removal Tool: 9 Tools, One Order That Works

December 3, 2023

Why Is My Sewing Machine Not Turning On? Six Checks

December 4, 2023

Why Does My Needle Keep Breaking? 7 Checks That Stop It

December 5, 2023
Affiliate Disclosure

Some of the links on this site are affiliate links, meaning that at no additional cost to you, I may earn a small commission if you click through and make a purchase. This helps support the website and allows me to continue creating content for you.

About Us
About Us

Discover top sewing machine reviews, expert guides, and free resources for sewing, quilting, embroidery, and various crafts at Craftsing.

Contact Us: contact@craftsing.com

Our Picks
Trending

How to Sew on a Patch by Hand: 7 Steps From Pin to Press

June 26, 2026

Sew a Stunning Swing Tunic: Your Simple Step-By-Step Guide

April 25, 2026

The Surprisingly Simple Way To Make a Hexagon Table Topper (No Binding!)

April 23, 2026
Facebook X (Twitter) Instagram Pinterest
  • Home
© 2026 Craftsing. Designed & Developed by Fixrweb.com.

Type above and press Enter to search. Press Esc to cancel.

See more from Craftsing in your Google results. Add it as a preferred source.

Ad Blocker Enabled!
Ad Blocker Enabled!
Our website is made possible by displaying online advertisements to our visitors. Please support us by disabling your Ad Blocker.