


Your front door is the first “hello” your home gives to visitors. It’s the centerpiece of your home’s curb appeal. But what if your door looks tired, scuffed up, or just plain boring? You might think you need to spend a fortune on a brand-new door, but we have a secret for you.
A stunning DIY front door makeover is one of the easiest and most affordable ways to totally transform the look of your home.
This isn’t a project that takes weeks or requires a team of experts. This is a perfect weekend home project that anyone can do. With a little paint and a bit of creativity, you can add serious style and value to your house.
In this guide, we’ll walk you through every step. We’ll share smart tips, money-saving hacks, and even show you how to fix common mistakes. Let’s get ready to give your home the beautiful entrance it deserves!
Why a DIY Makeover is the Best Weekend Project
Giving your front door a new look is a project with a huge payoff. It’s one of the few updates that instantly boosts your home’s appearance without breaking the bank. Creating budget curb appeal is all about making smart, high-impact changes, and this project is at the top of the list.
You get the satisfaction of doing it yourself, and every time you walk up to your home, you’ll feel a little spark of pride. Plus, it’s a great way to introduce your home’s personality before anyone even steps inside.
Your Game Plan: Supplies for the Makeover
Before you start, it’s a good idea to gather all your supplies. Having everything ready makes the process smooth and fun. Here is a simple list of what you’ll likely need for this project.
| Category | Supplies Needed |
|---|---|
| Cleaning & Prep | All-purpose cleaner, hose or bucket, rags, painter’s tape, fine-grit sandpaper |
| Painting | Exterior paint for the door and trim, paint brushes, small paint roller |
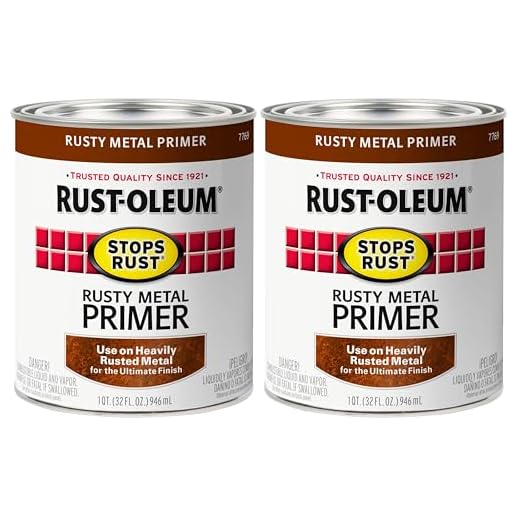
| Hardware Update | Rust-proof spray paint (like Rust-Oleum), a clear gloss protective spray |
| Safety & Cleanup | Plastic bags or drop cloths to protect the surrounding area |
A Step-by-Step Guide to Your Front Door Transformation
Ready to get started? We’ve broken this DIY front door makeover into simple, easy-to-follow steps.
Step 1: Prep and Clean for a Perfect Finish

You can’t get a beautiful paint job on a dirty surface. The first step is always to clean your door thoroughly.
Use a garden hose to spray off any loose dirt, dust, and spider webs. Then, grab an all-purpose cleaner and a rag to scrub away any grime and scuff marks. A clean surface helps the new paint stick properly and gives you a smooth, professional-looking finish. It’s best to do this the day before you plan to paint so the door has plenty of time to dry completely.
Step 2: A Smart Hack for Old Door Hardware
Does your door handle or lock look dated? You don’t have to buy a new one! One of the best budget tricks is to spray paint the door handle.
First, use painter’s tape and plastic bags to carefully cover the area around the handle. You don’t want any stray paint on your door. Next, lightly sand the handle. This roughs up the shiny finish and helps the spray paint grab on.
Wipe off the dust, and then apply a rust-proof spray paint in light, even coats. An oil-rubbed bronze or a matte black color can make old hardware look modern and new. After a few coats, finish with a clear gloss spray to protect it from weather and wear. This small step saves money and makes a huge impact.
Step 3: Painting the Trim (and How to Pick the Right Color!)
Now it’s time for paint. A great way to add depth is to paint the door trim a different color from the door itself.
But let’s be real: picking the right paint color can be tricky! It’s a good idea to get a few small sample swatches from the store and hold them up against your house. Look at them in the morning light and in the afternoon shade. In our project, the first two gray colors we tried looked completely different on the trim than they did on the swatch.
Don’t be afraid to go back to the store if a color isn’t right. We finally landed on a beautiful color called “Safari Vest,” which was a perfect match. Always test your color in a small spot before you paint everything. It will save you a lot of time and frustration!
Step 4: How to Paint a Front Door Like a Pro
This is the most exciting part! Choosing a color for your door is where your personality can shine. For great front door paint ideas, look at the accent colors you use inside your home. A beautiful dusty teal or a bold, sunny yellow can be a wonderful hint of what’s inside.
When you’re ready to paint, start with the indented panels of the door. Use a brush to carefully paint all the corners and edges first. Then, you can use a small roller to paint the flat parts of the door. This method gives you a smooth, even coat without any drips. Apply two coats for the best coverage and richest color.
Taking It to the Next Level: Upgrading the Details

If you want to go a step further, a few other small changes can make your door look brand new.
One easy update is to replace your outdoor light fixture. A new, modern light can completely change the feel of your entryway and tie in with your newly painted hardware.
What if your door has a dated glass insert? Instead of buying a whole new door, you can often just replace the glass! You can find affordable glass inserts at most home improvement stores. While removing the old one and fitting the new one can be a little tricky, the result is incredible. It can make an old door look custom-made and modern.
FAQs
How to update a front door without replacing it?
You can make a big change. A fresh coat of paint works wonders. You can also paint your old handles. A new light fixture adds a lot of style. You can even replace the glass insert.
How do I beautify my front entrance?
Start by cleaning everything. Paint your door a happy color. Put potted plants on both sides. A new welcome mat is a great touch. You can also update your outdoor lighting.
What is the most welcoming front door color?
Many colors can feel welcoming. Classic red is very popular and cheerful. A sunny yellow feels happy and bright. Soft blues and teals feel very calm. The best color is one that you love.
How to create an illusion of entryway?
You can create a special entry spot. Place a small rug just inside the door. Add a thin table against the wall. A mirror on the wall makes it feel bigger. You can also add a few wall hooks for coats.
How to refurbish a front door without removing it?
You can do it right in place. First, clean the door very well. Use tape to protect the hardware and windows. Lightly sand the surface for the new paint. Then, you can start painting. It is an easy weekend project.
Your Amazing New Front Door Awaits!
And that’s it! A beautiful DIY front door makeover is a simple and powerful way to show your home some love. By cleaning and prepping your door, giving the hardware a fresh coat of spray paint, and choosing the perfect colors, you can create a welcoming entrance you’ll be proud of.
This project proves that you don’t need a huge budget to make a big difference. You just need a weekend, a little bit of paint, and the confidence to get started.
What color are you dreaming of for your front door? Share your ideas and questions in the comments below! We’d love to cheer you on.