


Have you ever walked past a sad-looking dresser at a thrift store and thought, “It has potential”? Maybe it was the perfect shape, but the color was all wrong. Or perhaps it was covered in scratches and had way too many knobs.
Good news! Turning that forgotten piece of furniture into a beautiful, custom centerpiece for your home is easier than you think. And it doesn’t have to cost a fortune. With a little bit of work, you can take a $20 find and make it look like a million bucks.
This guide will show you exactly how to flip a thrifted dresser from start to finish. We’ll walk you through every step, from prepping the surface to installing beautiful new hardware. Get ready to unlock your inner DIY expert and create a piece you’ll be proud of.
What You’ll Need for Your Dresser Transformation
Before you start your project, it’s a good idea to gather all your tools and materials. Having everything ready makes the process smooth and fun. You don’t need a professional workshop—just a few simple items.
| Item | Why You Need It |
|---|---|
| Thrifted Dresser | The star of the show! Look for one with a good shape and solid bones. |
| Sandpaper (120-grit) | To lightly scuff the surface so the new paint can grip onto it. |
| Clean Cloths | One dry and one damp cloth to wipe away all the dust after sanding. |
| Primer | This is the secret to a durable, professional finish. It helps paint stick. |
| Paint | Choose a high-quality furniture paint, like Fusion Mineral Paint, for great results. |
| Foam Roller & Brush | The roller gives you a smooth finish on flat areas, and the brush helps with corners. |
| Wood Filler | To fill in old hardware holes or any deep scratches. |
| New Hardware | New knobs or pulls are the “jewelry” that completes the look. |
| Drill | To remove old hardware and drill new holes if needed. |
Step 1: Prep Your Dresser for a Fresh Start
Everyone wants to jump right into painting, but the most important part of any furniture flip is the prep work. Taking the time to prepare your dresser properly will guarantee a beautiful and long-lasting finish.
Clean and Remove Old Hardware
First, take off all the old knobs and pulls. A simple screwdriver or drill will do the trick. You might be surprised at how different the dresser looks without them!
Place all the old hardware in a small bag. You never know when you might need a vintage knob for another project. It’s always a good idea to keep them.
The Secret to a Perfect Paint Job: Sanding

Next, it’s time to sand. Don’t worry, you don’t need to sand the dresser all the way down to the bare wood. The goal is just to “scuff up” the surface. This removes the shiny top layer and gives the primer something to stick to.
Use a medium-grit sandpaper, like 120-grit, and lightly sand the entire piece. Go over the top, sides, and drawer fronts. You’ll know you’re done when the surface feels a little rough and looks dull.
Wipe It All Down
Sanding creates a lot of dust. Before you even think about opening a can of paint, you need to clean it all off. First, use a dry cloth to wipe away the majority of the dust. Then, follow up with a slightly damp cloth to catch any remaining bits. Let the dresser dry completely before moving on.
Step 2: The Magic of Primer
If you’re painting over a dark wood stain with a lighter color, primer is your best friend. Primer does two important things: it blocks the old color from bleeding through, and it gives your paint an even base to stick to. This step makes your final paint job look smoother and last longer.
Using a product like Zinsser Bullseye 123 Primer works wonders. It’s very sticky and adheres to almost any surface. You only need one good coat. Use a brush to apply it, and don’t worry about making it look perfect. Just get an even layer on everything you plan to paint.
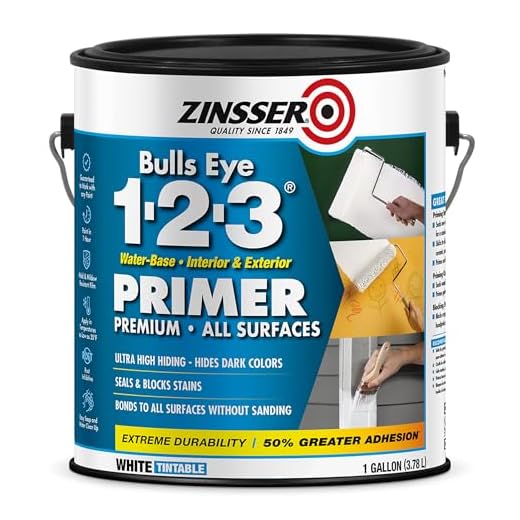
It’s best to let the primer dry overnight to make sure it’s fully cured and ready for paint.
Step 3: Bringing Your Vision to Life with Paint
Now for the fun part: adding color! This is where your dresser transformation really begins. For furniture, using a high-quality paint like Fusion Mineral Paint is a great choice. It’s easy to work with and dries to a hard, durable finish, so you don’t even need a separate top coat.

How to Get a Smooth, Flawless Finish
To avoid brush strokes, use a small foam roller for all the flat surfaces, like the top and drawer fronts. A little bit of this type of paint goes a long way. The foam roller spreads it easily and leaves a perfectly smooth finish. Use a small brush for any tight corners or details the roller can’t reach.
Apply your first coat and let it dry completely. Then, apply a second coat to get full, rich coverage. The difference between the first and second coat is amazing!
Step 4: The Finishing Touch – New Hardware

Changing the hardware is one of the easiest ways to make a huge impact. It can completely change the style of a piece. Swapping old, dated knobs for modern brass pulls or simple black knobs can take your dresser from thrifted to high-end.
What If You Change Your Mind? Fixing Holes
Sometimes you decide to change your hardware plan halfway through. Maybe you wanted two knobs per drawer, but now you want a single pull in the center. Don’t panic! This is an easy fix.
Simply fill the old, unwanted holes with wood filler. Let it dry completely. Once it’s dry, sand the filler down until it’s perfectly smooth and flush with the drawer front. You shouldn’t be able to feel a bump. Then, drill your new hole in the correct spot. Finally, use a small brush to touch up the paint over the wood filler. No one will ever know the old holes were there.
Your Thrifted Dresser Makeover on a Budget
One of the best things about a DIY furniture flip is how affordable it is. You can create a custom piece for a fraction of the cost of buying new. This project was done for under $50!
| Item | Estimated Cost |
|---|---|
| Thrifted Dresser | $20 |
| Sample Pot of Paint | $15 |
| New Hardware | $10 |
| Sandpaper & Primer | $5 (if you don’t already have them) |
| Total | ~$50 |
FAQs
How can I make my dresser look pretty?
A fresh coat of paint works wonders. You can also change the hardware. New knobs or pulls make a big impact. Keep the top neat and simple. Add a small lamp, a plant, or a nice tray.
How to upcycle an old pine dresser?
Upcycling a pine dresser is a great project. First, give it a light sanding. This helps the new paint stick better. Then, apply a coat of primer. Finally, paint it your favorite color. New hardware will complete the new look.
How to modernise an old chest of drawers?
To make a dresser look modern, paint it a neutral color. White, grey, or black are great choices. Use simple, sleek hardware. Long, straight pulls look very modern. This creates a clean and updated style.
Can you repurpose a dresser?
Yes, a dresser can have many jobs. You can use it as a TV stand. It can be a buffet in your dining room. It also works as an entryway table for storage. In a nursery, it can become a changing table.
What color dresser is in style?
Natural wood tones are always in style. Neutral colors like white and grey are also very popular. For a bit of color, try earthy tones. Sage green and dark, dusty blues are beautiful and trendy right now.
Your Amazing Furniture Flip is Complete!
And there you have it. With a little bit of time and effort, you’ve learned how to flip a thrifted dresser and turn it into a beautiful piece that fits your style perfectly. You took something old and unwanted and gave it a brand new life.
This process—prep, prime, paint, and new hardware—can be used on almost any wooden furniture. Nightstands, bookshelves, and side tables are all great candidates for a similar makeover.
Now, stand back and admire your work. You’ve created a one-of-a-kind piece for your home that has a story.
What will you transform next? Let us know about your dream thrift flip project in the comments below