


Are you tired of swimsuits that don’t fit just right? Learning how to draft swimsuit patterns yourself is easier than you think! With some basic measurements and simple tools, you can create a custom one-piece swimsuit that fits your body perfectly. This guide will walk you through each step of creating your own swimsuit pattern from scratch.
Why Make Your Own Swimsuit Pattern?
Store-bought swimsuits often don’t match our unique body shapes. When you draft your own swimsuit pattern, you get to decide everything – from how high the leg openings are to how much coverage you want in the back. Plus, once you have your basic pattern, you can use it over and over with different fabrics to create a whole collection of swimwear that fits you perfectly.
Measurements You’ll Need
Before you start drafting your swimsuit pattern, you need to take some key measurements. Get a measuring tape and write down these numbers:
| Measurement | How to Measure | Example |
|---|---|---|
| Shoulder to bust | From shoulder point down to fullest part of bust | 8 inches |
| Bust to waist | From fullest part of bust to natural waistline | 7 inches |
| Waist to hip | From waistline to fullest part of hip | 10 inches |
| Across shoulder | Width of shoulders from point to point | Varies |
| Bust | Around fullest part of bust | Varies |
| Waist | Around natural waistline | 29 inches |
| Hip | Around fullest part of hip | Varies |
| Crotch depth | From waist to where legs meet | 12 inches |
These measurements will help you create a pattern that fits your body perfectly. Everyone’s body is different, so your custom pattern will be unique to you!
Materials You’ll Need
You don’t need fancy equipment to draft a swimsuit pattern. Here’s what you should gather:
- Pattern paper or large paper (even wrapping paper works!)
- Ruler or measuring tape
- Pencil
- Eraser
- Pattern master or French curve (helpful but not required)
- Scissors
- Marker or pen
Creating the Front Piece
Let’s start by drafting the front piece of your swimsuit pattern. This forms the foundation of your swimsuit.
First, draw a short horizontal line at the top of your paper. This will be your shoulder point. From here, you’ll mark all your vertical measurements.
Mark down from the shoulder point to your bust line (in our example, 8 inches). Then mark from your bust to your waist, and from your waist to your hip. Draw horizontal lines at each of these points by squaring across.
Now for the width measurements. Mark half of your across shoulder measurement from the edge. For the bust line, mark a quarter of your bust measurement minus 1 inch from the center. Do the same for your waist measurement.
Next, mark 2.5 inches below your waistline. This helps create the leg shape that most one-piece swimsuits have. Draw a horizontal line here too.
To create your neckline, mark 2.5 inches above your bust line and 3.5 inches horizontally from the center front. If you want your shoulder strap to be 2 inches wide, mark this width and drop it by half an inch to create a slanted shoulder seam.
Draw a curved neckline connecting these points, then create your armhole curve going down to the bust line. This will give your swimsuit a lower cut arm opening.
For the side seam, connect the bust line to the waistline with a gentle curve. The bottom part of your swimsuit should have a natural curve like underwear, about 1 inch wide at the center (which becomes 2 inches when the pattern is unfolded).
Drafting the Back Piece

The back piece is similar to the front, but with a few important differences:
- The back neckline is shallower, about half an inch higher than the front.
- The back side seam isn’t as curved in the middle since our backs are flatter than our fronts.
- The bottom edge curves outward more to give better coverage for your backside.
Trace the side seam from your front piece, making sure to transfer the waistline notch to help you line up pieces later. Draw the back neckline and shoulder strap to match the front piece. The bottom edge should meet at the same points as the front but with a more outward curve for better coverage.
Creating the Crotch Piece
The crotch piece is cut on a fold to create one seamless piece. Trace the bottom edge of both front and back pieces up to the hip line. This creates a piece that connects the front to the back smoothly. The center front and center back edges should be on the fold when cutting fabric.
Making the Bust Cups
For added support, create a separate bust cup piece. This sits about one inch above your bust line and follows the same side seam as your front piece. It doesn’t go all the way to the shoulder points but provides support where you need it most.
Putting It All Together
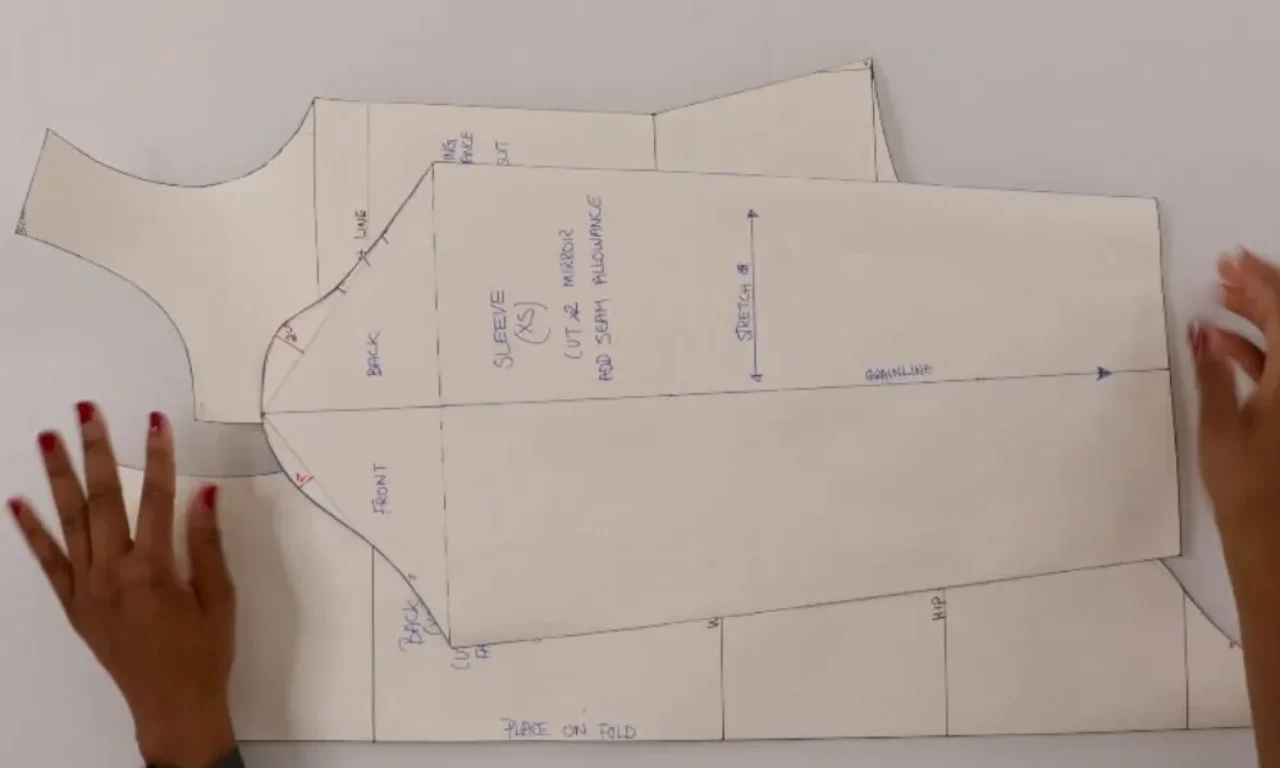
When you’ve finished drafting, you’ll have four pattern pieces:
- The front piece
- The back piece
- The crotch piece (cut on fold)
- The bust cup piece
Double-check that all your pieces line up correctly at the seams. Make sure the side seams of the front and back pieces are the same length, and that the crotch piece matches both the front and back bottom edges.
Tips for Success
- Take your time with measurements – accuracy matters most when creating a custom pattern.
- Use a pencil so you can erase and adjust as needed.
- Remember that swimsuit fabric stretches, so your finished swimsuit will have some give.
- Always test your pattern with inexpensive fabric first before cutting into your good swimsuit material.
- Label each pattern piece clearly with “front,” “back,” “crotch,” and “bust cup” to avoid confusion later.
Frequently Asked Questions About Swimsuit Making
How can I make my own swimsuit?
Making your own swimsuit starts with creating a proper pattern. First, take your measurements carefully. Then, choose a stretchy swimsuit fabric and proper supplies like stretch needles and elastic. Follow a step-by-step pattern guide, and start with simple designs before trying complex styles. Remember to make a test version first using cheaper fabric.
How to start making swimwear?
Starting swimwear making is easier than you might think. Begin with basic supplies: stretch fabric, elastic, proper needles, and a good pattern. Learn about negative ease and how stretchy fabrics work. Practice sewing on scrap pieces first. Start with a simple one-piece design before moving to more complex styles.
What is the best stitch for swimwear?
The zigzag stitch is perfect for swimwear. It allows the fabric to stretch without breaking the threads. Use a stitch length of 2.5-3mm and a width of 1.5-2.5mm. A serger/overlocker is also great for swimwear, but a regular sewing machine with stretch stitches works well too.
How do you look cute in a swimsuit?
A well-fitted swimsuit is key to looking great. That’s why making your own is so helpful – you can adjust every measurement to your body. Choose a style that makes you feel confident. Add design elements that highlight your favorite features. Remember, proper fit matters more than trendy designs.
Can I use a bra as a swimsuit?
Regular bras aren’t made for swimming. They use materials that can break down in chlorine and saltwater. Instead, learn to add proper swim bra support to your swimsuit pattern. This gives you better support and longer-lasting wear. Plus, swimsuit materials are specifically designed for water activities.
Ready to Dive In?
Now you know how to draft swimsuit patterns that will fit you perfectly! With these four simple pattern pieces, you can create a custom swimsuit that looks and feels great. Once you master this basic one-piece design, you can modify it to create different styles – higher necklines, different back designs, or even convert it to a tankini or bikini.
Remember that Collar Pattern Drafting: Create Stunning Professional Results Every Time”>pattern making gets easier with practice. Your first swimsuit pattern might take some time, but each one after that will be faster and better. So grab your measuring tape and paper, and get started on your custom swimsuit journey today!
Want to show off your creation? Share photos of your handmade swimsuit online and inspire others to make their own perfect-fitting swimwear. Happy sewing!