Securely attaching buttons is an essential sewing skill that comes in handy for clothing repairs or replacing loose buttons. With the right technique, you can achieve a professional-looking and durable result by hand sewing buttons.
- Gather thread, needle, garment, and replacement button
- Knot the thread end and start sewing from the front
- Create a raised shank and secure stitches underneath
- Trim excess thread and optionally add a final knot
Can you confidently hand-sew buttons to prevent them from falling off again? Read on to master this simple yet crucial skill.
Prepare Your Materials
Before you begin, ensure you have all the necessary supplies within reach. In addition to the garment and replacement button, you’ll need:
Thread and Needle
Choose a sharp, thin needle with an eye large enough for your all-purpose thread to pass through easily. The cotton or polyester all-purpose thread that closely matches the garment color works best for hand-sewing buttons.
Flat or Slightly Curved Buttons
While you can hand sew various button types, flat or slightly curved buttons without a shank (hollow underside) are the easiest. Shank buttons made for machine sewing can be more challenging.
Get Your Button Sewing Strategy

Sewing buttons by hand is a simple task, yet focusing on specific details guarantees a secure and durable outcome. Here’s an overview of the main steps:
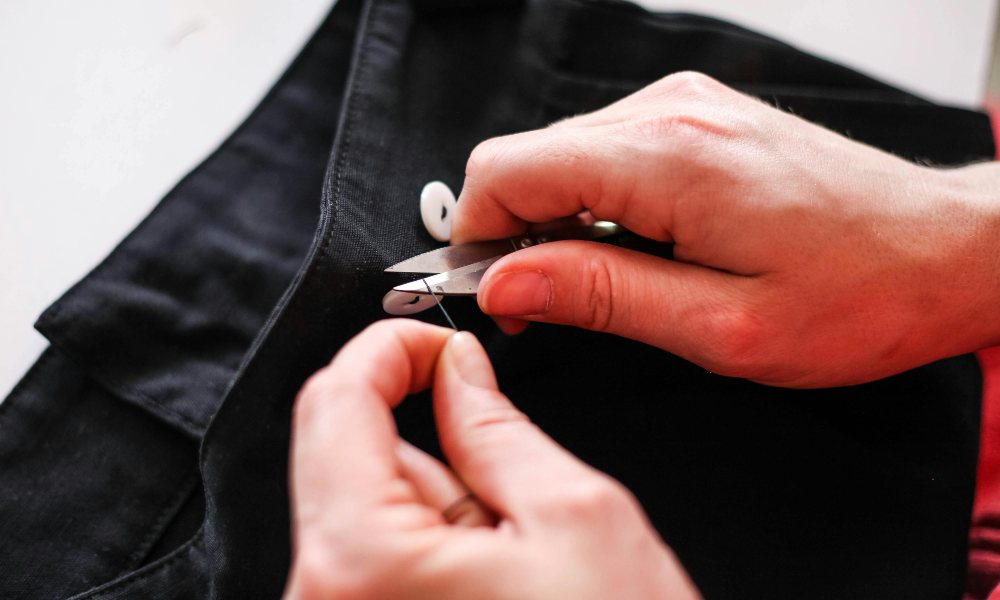
Start Stitching from the Front
Position the button on the desired location and bring the knotted thread end to the front. Sewing from the front gives you better visibility and control over your stitches.
Create a Raised Shank
Form a raised “shank” by threading the needle through the buttonholes and fabric at an angle to avoid sewing the button too tightly onto the fabric. Wrap the thread several times around this raised portion before pulling through.
Secure Stitches on Underside
Working from the underside, make 8-10 stitches through the shank and fabric, keeping them close together. Wrap the thread snugly around the shank each time for extra durability.
Add Finishing Touches
Once secure, trim any excess thread on the front close to the button. You can also tie a final knot on top and apply clear nail polish or fabric glue to prevent loosening over time.
Tips for Achieving Button Perfection
While sewing on buttons is relatively simple, a few additional tips can help you achieve an impeccable, long-lasting finish:
Use a Thimble
Wear a thimble to protect your finger when pushing the needle through the thick fabric and button holes without pricking yourself.
Double Up Thread
For extra strength on heavy coats or outerwear, hand-sew buttons using a double strand of thread.
Check Positioning
Ensure your button is positioned correctly before sewing by buttoning up the garment and examining the button placement and alignment.
Experiment with Decorative Stitches
For a creative touch, try using decorative hand-sewing stitches, like the blanket stitch, instead of basic ones around the button edges.
Easily Replace Loose or Missing Buttons
With some practice, you can confidently replace loose or missing buttons on any garment using this simple hand-sewing technique. Master this handy skill to extend the life of your clothes and save money on repairs or alterations. Can you sew on new buttons like a seamstress pro?
FAQs
Why hand-sew buttons instead of using a sewing machine?
While sewing machines can attach buttons, hand sewing gives you more control and is better for repairing individual buttons on finished garments. It also works for buttons on thick fabrics that may be difficult to maneuver under a machine.
What type of thread should I use for hand-sewing buttons?
All-purpose thread made of cotton or polyester works well. Select a thread hue that closely complements your garment. For extra strength on heavy fabrics, use a doubled thread.
How do I keep the button from being sewn on too tightly?
Creating a raised shank with thread wraps under the button allows room for the button to sit slightly above the fabric. This prevents it from being sewn down too flat and restricts buttoning/unbuttoning.
How can I prevent the thread from unraveling over time?
Tie a secure knot before trimming any excess thread after sewing on the button. You can also apply a dab of clear nail polish or fabric glue over the knot to lock it in place and prevent loosening.
What’s the best way to position buttons?
Try buttoning up the garment and adjusting placement before sewing. Ensure buttons are evenly spaced and aligned correctly. Mark placement with chalk or pins for accuracy.
***
Can you now flawlessly hand sew buttons like a pro tailor or seamstress? Mastering this essential skill opens up endless possibilities for repairing, upcycling, and customizing all your favorite clothes and accessories.
***
Main image: pexels


