Industrial Sewing Machine Needles: Systems, Sizes and Points Explained (2026)
Industrial sewing machine needles are sized and pointed differently from home machine needles: check your machine manual for the needle system such as 134 or 135×17, pick the size from the fabric weight, for example 90/14 for denim, and choose the point style, round R for wovens, ball point for knits, leather point for leather.
Why the Right Needle Matters

An industrial machine runs at high speed under high tension, so the needle takes far more stress than a home machine needle. The wrong system can jam the hook, the wrong size can snap or skip, and the wrong point can tear your fabric. Getting the needle right is the cheapest insurance for clean seams.
How to Read a Needle Pack

Every pack prints two things you need: the needle system, for example 134, 135×17 or DPx5, and the size in metric and US numbers, for example 90/14. The system must match your machine, the size and point you choose for the fabric. Home machine needles use the 130/705 H system and are not built for industrial speeds.
Step 1: Find Your Machine’s Needle System

The machine fixes the needle system. It is printed in the manual, on the machine head, and on the needle pack. Common systems and the machines that use them:
| Machine class | Needle system | Aliases |
|---|---|---|
| Single-needle lockstitch (Juki DDL-8700 class) | DBx1 | 1738, 16×231 |
| Zigzag, bartack, buttonhole | DPx5 | 134, 135×5, SY1955 |
| Walking foot / unison feed | 135×17 | DPx17, SY3355 |
| Cylinder-bed, heavy leather | 134-35 | DPx35 |
| Coverstitch / chainstitch | UY128GAS | TVx3, 149×3 |
Note that 134 and 135×5 are the same system, and 135×16 (leather point) and 135×17 (cloth point) are interchangeable physically. If you are unsure, the manual wins.
Step 2: Understand Needle Sizes

The metric number Nm is the blade diameter in hundredths of a millimeter, so size 100 is 1 mm thick; the second number is the US size. Bigger number means a thicker, stronger needle. Pick the smallest size that pierces your fabric easily: too small and the needle deflects or breaks, too large and it punches big holes that pucker.
| Size (Nm/US) | Typical fabric | Thread guide |
|---|---|---|
| 60/8 to 70/10 | Silk, chiffon, organza | Fine thread, Tex 27 or less |
| 80/12 | Light cotton, shirting | Tex 27 to 40 |
| 90/14 | Denim, canvas, medium woven | Tex 45 to 70, about size 69 thread |
| 100/16 to 110/18 | Upholstery, vinyl, light leather | Tex 80 to 135, about size 138 thread |
| 120/19 to 140/22 | Heavy leather, tarps, coated | Heavy bonded thread |
Machine Setup Basics for Needles and Thread
Video note: this Brother support video demonstrates basic straight and zigzag stitches on a home machine; the stitch families are the same on industrial lockstitch machines, though the video itself is a general machine demo rather than an industrial needle tutorial. Channel: @BrotherSupportSewing.
Thread the machine with the presser foot up so the tension discs open, and pass the thread through the needle eye from front to back. A needle that is the right size for the thread lets the thread sit in the groove without shredding; if the thread frays, go up one needle size.
Step 3: Match the Point Style to Your Fabric

The point decides how the needle enters the fabric, so choose it by material:
| Point style | Best for | Note |
|---|---|---|
| R (round / universal) | Wovens, most general sewing | Standard for lockstitch machines |
| FFG / SES (ball point) | Knits, jersey, stretch | Slips between fibers, prevents snags |
| S / NCR (narrow cross point) | Footwear, bags, upholstery | Straight stitches, thread sits deeper |
| LR / LL (leather point) | Leather, vinyl | Cuts a clean angled hole, decorative seam |
| SD1 / D1 (cutting) | Hard, dry leather | Diamond or spear cut for heavy hides |
Step 4: Match Needle Size to Thread

The rule is to use the smallest needle whose eye fits the thread comfortably. As a cross-check: size 69 bonded thread suits about a size 18 (110) needle, and size 138 thread suits about a size 23 (160) needle. If the thread breaks constantly, move up one needle size rather than raising tension.
- Thread too thick for the eye: fraying and breakage, go up one size.
- Needle too big for the fabric: visible holes and puckering, go down.
- Always test on a scrap of the actual layers.
Stitch Settings That Protect the Needle
Video note: this Brother support video shows how to set stitch length and width on a machine; correct stitch settings reduce needle deflection and breakage on any machine, but it is not a needle-selection tutorial. Channel: @BrotherSupportSewing.
On most industrial lockstitch machines a stitch length of about 3 to 4 mm suits general garment work; shorter stitches for fine work, longer for topstitching. Too long a stitch on thick layers makes the needle deflect into the hook plate. Keep the default stitch length unless the fabric demands a change.
Step 5: Buy Quality Needles

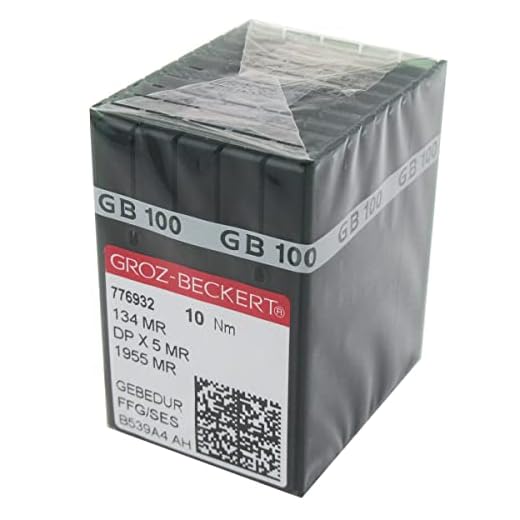
Stick to established needle makers such as Schmetz, Organ and Groz-Beckert. Cheap needles can bend or shatter at speed and damage the hook. A 100-count assorted box of DPx5 needles covers most garment sizes so you always have the right one on hand.
For a reliable starter stock, the Groz-Beckert DPx5 135×5 industrial needle box with 100 assorted needles covers the common sizes in one pack. You can also grab the same 100-piece Groz-Beckert needle box when you restock.
Step 6: Insert and Change the Needle Correctly

Raise the needle bar to its highest point, loosen the clamp screw, and push the new needle up as far as it goes with the flat side of the shank facing the correct side (check the manual, usually flat to the right on lockstitch machines). Tighten firmly. For the full step-by-step on home machines, see How to Replace a Sewing Machine Needle in 5 Steps.


Step 7: Know When to Replace the Needle

Replace the needle every 6 to 8 hours of sewing, or immediately if you hear a popping sound, see skipped stitches, or find burrs on the tip. A bent needle strikes the needle plate or hook and can break, sending metal into the bobbin area. Never sew over pins.
- Skipped stitches: dull or bent tip, replace first.
- Thread shredding: burr in the eye, replace.
- Fabric snags on knits: wrong point or bent tip.
- After hitting a pin: always replace, even if it looks fine.
Troubleshooting Needle Problems
Most stitch faults trace back to the needle. Work through this order: confirm the system matches the manual, confirm size and point suit the fabric, rethread completely, then replace the needle. If problems persist, check the hook timing with a technician.
- Puckering: needle too large or thread too heavy, go down a size
- Looping on the back: rethread, needle may be in backwards
- Needle breaks: hitting plate or pin, wrong system, or size too small
- Uneven stitches: bent needle or wrong point for the knit
Caring for and Storing Needles
Keep needles in their labeled box, dry, away from humidity that causes rust. Wipe needles with a soft cloth if adhesive or fusible residue builds up, and never mix used needles with new ones. Label sizes on the box so you can restock the sizes you actually use. When changing needles on any machine, the same habits apply; see how to replace a sewing machine needle for the clamp steps in detail.
Frequently Asked Questions
Can I use home machine needles in an industrial machine? No. Home needles use the 130/705 H system and are not built for industrial speed and tension; use the system your manual specifies, such as 134 or 135×17.
What needle system does my industrial machine use? Check the manual or the label on the machine head; common ones are DBx1 for single-needle lockstitch, DPx5 (134) for zigzag and bartack, and 135×17 for walking foot machines.
What size needle for denim on an industrial machine? Start with 90/14 to 100/16 with an R point; go up to 110/18 for heavy denim stacks.
What point for knits? A ball point, FFG or SES, which slips between the fibers instead of piercing them and prevents runs.
What is the difference between 134 and 135×5? Nothing; they are the same system, also sold as DPx5 or SY1955.
How do the two numbers on a needle mean? The first is the metric Nm, blade diameter in hundredths of a millimeter; the second is the US size. 90/14 is one size shown two ways.
How often should I change an industrial needle? Every 6 to 8 hours of sewing, and always after hitting a pin or hearing a popping sound.
Why does my thread keep breaking? Usually the needle eye is too small for the thread or the tip is burred; go up one needle size or replace the needle.
Conclusion
Choosing industrial sewing machine needles comes down to three checks: the system from your machine manual, the size from your fabric weight and thread, and the point style from the material. Keep a labeled box of quality DPx5 or 135×17 needles, replace them every 6 to 8 hours, and most skipped stitches, breakages and puckering disappear before they start.
About This Guide
This guide was prepared by the CraftSing editorial team and checked against manufacturer needle documentation from Groz-Beckert and Schmetz. For fabric, thread and needle compatibility on home machines, see the manufacturer reference chart from Brother: Brother fabric and needle chart. Product mentions are based on publicly available ratings and specifications at the time of writing.
FTC disclosure: CraftSing may earn a commission when you buy through affiliate links on this page, at no extra cost to you. This does not influence our recommendations.
All images in this article were created using AI.