Why Your Sewing Machine Thread Keeps Breaking and 8 Safe Fixes (2026)
If your sewing machine thread keeps breaking, start with the free fixes: rethread the upper path with the presser foot up, replace the needle, seat the spool with the right cap, and set the tension back to the middle. Clean lint from the tension discs and bobbin area, then test on scrap; most breakage stops there.
Why Thread Breaks and Where to Look First

About 80 percent of the time it is the upper thread that breaks, and almost always the cause is one of: wrong threading, a bad needle, a snagging spool, tension set too tight, or old weak thread. Work through the checks below in order; the first four are free and take minutes.
Read the Break: Snap or Shred

A clean snap means the thread was overloaded, usually by tension or a sudden catch on the spool. A fuzzy, shredded end means the thread is sawing against a rough edge, normally the needle eye, a burr on the needle plate, or a nicked thread guide. Also note where it breaks: between spool and tension discs is a feed problem, at the needle is a needle or plate problem.
Check 1: Rethread the Upper Path Completely

Raise the presser foot so the tension discs open, bring the needle to its highest position, pull all the thread out, and rethread from the spool pin down through every guide, the tension discs, the take-up lever, and finally the needle front to back. Missing the take-up lever is the most common threading mistake and causes immediate breakage.
Threading Setup Basics
Video note: this Brother support video shows basic straight and zigzag stitching and the machine setup around it; threading habits in the video apply to any machine, though the video itself is a general demo rather than a thread-breakage tutorial. Channel: @BrotherSupportSewing.
Keep the presser foot up while threading, use the correct spool cap for the spool size, and leave a 4 to 6 inch thread tail behind the presser foot before you start. For the full first-time setup, see How to Use a Sewing Machine: 8 Steps From Threading to a Straight Seam.
Check 2: Replace the Needle

A bent, dull or wrong-size needle shreds thread on every pass, and a needle inserted wrong or not pushed fully up breaks thread at the eye. Fit a fresh needle, correct size for the thread and fabric, flat side to the back, pushed all the way up. See Changing Your Sewing Machine Needle: A Step-By-Step Guide for the full steps.
Check 3: Seat the Spool and Cap Correctly

A spool that catches on its own notch, rubs the pin, or uses an oversized cap jerks the thread and snaps it, often only at speed. Seat the spool so it unwinds in the intended direction, slide the cap snug against it, and check for knots or tangles on the spool. Cross-wound spools usually want a vertical pin; stacked spools a horizontal one. For metallic or monofilament thread, add a spool net.
Check 4: Match Thread, Needle and Fabric

The needle eye must be large enough for the thread, and the needle size must suit the fabric. Too small an eye frays and snaps the thread; too large a needle punches holes that weaken the seam.
| Thread weight | Needle size | Fabric example |
|---|---|---|
| Fine, 100wt | 70/10 to 80/12 | Silk, chiffon, voile |
| All-purpose 50wt | 80/12 to 90/14 | quilting cotton, shirting |
| Denim or upholstery | 100/16 to 110/18 | Denim, canvas, twill |
| Heavy topstitch | 90/14 to 100/16 with big eye | Decorative topstitching |
Check 5: Set the Tension Back to the Middle
Video note: this Brother support video shows how to change stitch length and width and how tension settings behave; use it to reset your dial to the middle before adjusting, but it is not a troubleshooting tutorial. Channel: @BrotherSupportSewing.
Upper tension that is too tight is a direct cause of snapping. Return the dial to the middle of its range, about 4 on many machines, or 3 to 5 for regular thread, before changing anything else; tension cannot be judged correctly while the machine is threaded wrong. Adjust in half-number steps and test on two layers of scrap.

Check 6: Clean the Tension Discs and Bobbin Area

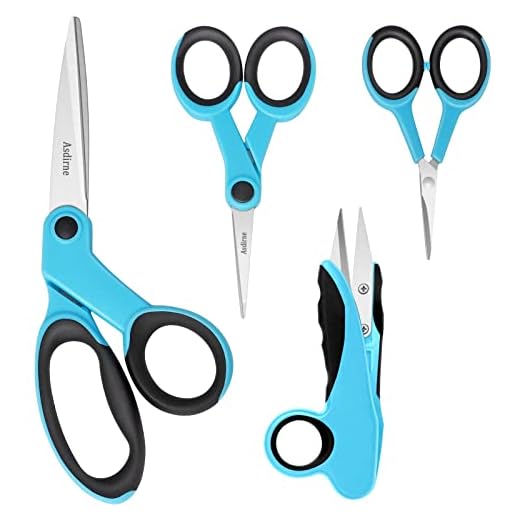
Lint packed into the tension discs stops them gripping evenly, and lint or a stray thread end in the bobbin area adds drag that snaps thread. With the machine off and unplugged, brush out the discs, guides and bobbin area, and remove any thread nest gently with scissors instead of pulling.
Check 7: Inspect the Bobbin
Use the bobbin type your manual specifies, wind it evenly without bulging, insert it so the thread pulls in the correct direction, and make sure it rolls out smoothly through the case tension. An over-wound bobbin rubs the case; the wrong type adds friction that can snap the lower thread and disturb the upper thread too. Adjust bobbin case tension only in tiny turns, and only where your manual allows.
- Wrong bobbin type: replace with the specified class
- Uneven winding: rewind at steady speed
- Thread not in the tension spring: reseat it
- Scratches on the bobbin case: replace the case
Check 8: Feel for Burrs on the Plate and Path
Run a fingertip or a cotton swab along the thread guides, around the needle plate hole, and the presser foot opening. A nick from a broken needle creates a sharp edge that saws thread. Small nicks can be smoothed with fine emery cloth by a technician; a badly burred plate or foot should be replaced. If the thread always breaks at the same metal point, stop and inspect that part.
Use Fresh, Quality Thread

Old or bargain thread dries out, grows weak spots and sheds lint. Give a suspect spool a gentle tug; if it snaps easily, discard it. Reputable brands such as Gutermann, Mettler, Coats and Aurifil hold consistent thickness along the spool.



Cheap or old thread is a frequent cause of snapping. A quality all-purpose polyester thread such as the Gutermann Sew-All thread set, 20 spools of 100 m in assorted colors feeds smoothly and resists fraying. Stock the same Gutermann 20-spool Sew-All set so you always have fresh thread.
Test Safely and Know When to Stop
After each fix, sew a few straight stitches on two layers of scrap and check both sides: stitches should lock in the middle of the fabric rather than loop on top or show bobbin thread underneath. Never sew over pins, and stop immediately if you hear clicking or the needle deflects; continuing can damage the hook. If breakage persists after a full rethread, a fresh correct needle, clean machine and good thread, the machine needs service by an authorized technician.
- Test on scrap before the real project
- Hold both thread tails for the first stitches
- Stop at clicking sounds or repeated breaks at one point
- Book service if checks 1 to 8 do not fix it
Frequently Asked Questions
Why does my upper thread keep breaking? Most often because the machine is threaded wrong, the needle is bent or wrong size, the tension is too tight, or the spool is snagging. Rethread with the presser foot up, fit a new needle, and reset tension to the middle.
Why does the thread shred at the needle? Usually a burr in the needle eye or a needle inserted wrong or not fully up. Replace the needle with the correct size, flat side back, pushed fully up.
Can old thread cause breakage? Yes. Thread dries and weakens with age; if a spool snaps with a gentle tug, replace it with fresh quality thread.
Should I loosen the tension when thread breaks? Only after rethreading correctly; tension cannot be judged while threaded wrong. Set the dial back to the middle, about 3 to 5, then adjust in small steps.
Why does thread break only at high speed? That usually points to the spool feed: a notch catching the thread, a cap that is too big, or the wrong pin direction. Seat the spool and cap correctly and try a thread net or stand.
Can the bobbin cause upper thread breakage? Yes. A wrong-type, over-wound or badly seated bobbin adds resistance underneath, which disturbs the upper thread too.
Does the fabric matter? Yes. Too small a needle for thick fabric or heavy thread creates friction that snaps thread; match needle size to both.
When should I call a technician? If breakage continues after a full rethread, fresh correct needle, clean machine and good thread, or if you find a burred needle plate, damaged bobbin case, or clicking hook.
Conclusion
When your sewing machine thread keeps breaking, work the eight checks in order: rethread with the presser foot up, replace the needle, seat the spool and cap, match thread needle and fabric, reset tension to the middle, clean the discs and bobbin area, inspect the bobbin, and feel for burrs. Finish with fresh quality thread and a scrap test. Most machines stop snapping after the first two or three checks, and anything left over is a job for a technician.
About This Guide
This guide was prepared by the CraftSing editorial team and checked against Brother’s official troubleshooting pages: Brother: upper thread keeps breaking and the Brother fabric, thread and needle chart. Product mentions are based on publicly available ratings and specifications at the time of writing.
FTC disclosure: CraftSing may earn a commission when you buy through affiliate links on this page, at no extra cost to you. This does not influence our recommendations.
All images in this article were created using AI.