


⚡ Quick Answer: How to Sew an Elastic Waistband
Fold the top edge down by your elastic width plus 1/4 inch, stitch the casing shut leaving a 2 inch gap at the back, thread the elastic through, overlap the ends by 1 inch and zigzag across them twice, then close the gap and spread the gathers evenly. Cut woven elastic 2 inches shorter than your waist measurement, or knit elastic 3 inches shorter, and always test the loop around your body before you sew it closed.
An elastic waistband fails in one of three ways: it rolls over inside the casing, the join pops open after a month of wear, or the gathers bunch into three tight clumps and leave the rest of the waist flat. All three come from the same handful of decisions made before you sew: the elastic you bought, how long you cut it, and how deep you made the channel.
This guide covers the three methods that cover almost every garment you will make, with the cut sizes and settings written out so you can work without guessing. If you are new to the machine itself, work through how to use a sewing machine first, then come back.
The three ways to put elastic in a waistband
Every elastic waistband is one of three constructions. Pick by the fabric and by whether you want the elastic visible.
| Method | Best for | The catch |
|---|---|---|
| Casing (hidden) | Wovens: cotton skirts, pajama pants, shorts, scrub tops | Needs a channel of fabric, so it adds bulk at the waist |
| Exposed, stitched on | Sportswear, children’s clothes, quick makes | No turning under, so the elastic edge is on show forever |
| Knit band (fold over) | Jersey, rib knit, any stretch fabric | Uses ribbing, not flat elastic, and must be cut undersized |
If your garment is woven, you want the casing. If it is knit and you are making leggings or a t-shirt skirt, you want the knit band, and the settings in sewing stretchy fabric apply. The exposed method is the shortcut, and it is a good one for kids’ clothes where the garment will be outgrown before it wears out.
Buy the right elastic first
The cheapest fault to prevent is the rolled waistband, and it is bought, not sewn: match the elastic width to the weight of the fabric before you cut anything.
Most waistband problems are bought, not sewn. The four kinds behave differently under the needle and after ten washes.
| Type | What it does | Use it for |
|---|---|---|
| Braided | Narrows noticeably when stretched; the needle cuts the inner threads if you sew through it | Casings on light garments, drawstrings. Never stitch through it |
| Knit | Soft, holds width well, comfortable against skin | Everyday waistbands, kids’ clothes, anything worn all day |
| Woven (non-roll) | Keeps its width under tension and resists rolling | Waistbands on trousers and skirts, the sturdiest choice |
| Clear | Thin, transparent, stretchy in one direction only | Stabilising shoulder seams, not waistbands |
For an adult waistband, buy 3/4 inch to 1 inch woven or knit elastic. Anything narrower than 5/8 inch will fold over inside the casing on a garment with any weight to it, and anything wider than 1 1/2 inch starts to fight the casing depth. For children, 1/2 inch to 3/4 inch is right.
How long to cut the elastic
Two rules, and the second one matters more than the first.
The rule: measure the body where the waistband will sit, then subtract 2 inches for woven elastic or 3 inches for knit elastic. That is for a garment worn at the natural waist. For a waistband that sits on the hips, measure the hips instead.
The test: before you cut, wrap the uncut elastic around yourself at the right height, overlap the ends by an inch, and see how it feels. Stretch it out and let it settle. If it digs in, add an inch back. Elastic varies between brands, and the number on the packet is a starting point, not a law.
| Body measurement | Woven elastic | Knit elastic |
|---|---|---|
| 24 in (child) | 22 in | 21 in |
| 28 in | 26 in | 25 in |
| 32 in | 30 in | 29 in |
| 36 in | 34 in | 33 in |
| 42 in | 40 in | 39 in |
Add 1 inch to whichever figure you land on for the overlap at the join, or cut it long and trim after the join is sewn. Do not skip the test loop because the arithmetic looks clean.
Method 1: the casing waistband
This is the standard, and it is the one to learn properly. The measurements below assume 1 inch elastic; substitute your own width and the numbers stay true.
Step 1: finish the raw edge and fold twice

Zigzag or overcast the top edge of the garment first, because once it is folded inside the casing you cannot reach it. Then press a 1/4 inch turn-under to the wrong side, and press again by the width of your elastic plus 1/4 inch. For 1 inch elastic the second fold is 1 1/4 inches, which gives a finished casing of 1 1/4 inches with a quarter inch of ease so the elastic can travel without twisting.

Press with steam and let the folds cool flat before you sew. A casing pressed in place sews straight; a casing held only by pins wanders and comes out narrower at one side, which is exactly how a waistband ends up rolling.
Step 2: stitch the casing, leaving a gap

Sew close to the inner folded edge, all the way around, with a straight stitch at 2.5 mm. Stop and start to leave a 2 inch opening at the back, and backstitch at both sides of the gap so it does not tear wider while you thread. The back is the right place because the gap is easiest to close neatly there and least visible.
Step 3: thread the elastic

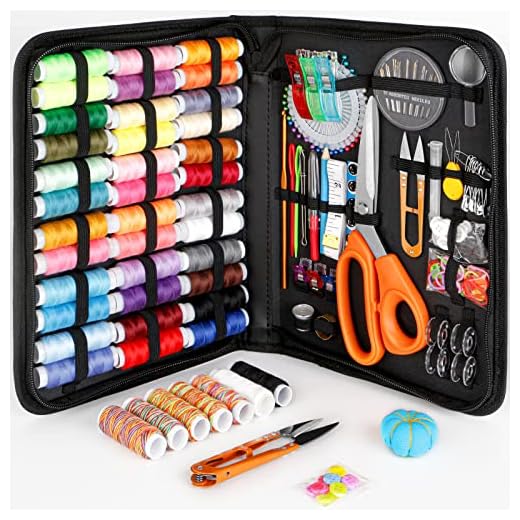
Pin a large safety pin through one end of the elastic, about 1/2 inch from the tip, and pin the other end to the garment so it cannot disappear inside. Work the safety pin around the channel an inch at a time, scrunching the fabric onto it rather than pulling the elastic. If the channel is long, a bodkin or a loop of tape threaded through first is faster.


Step 4: join the ends

Bring both elastic ends out through the gap, check the loop is not twisted anywhere in the channel, then overlap them by 1 inch with the ends flat, not curled. Sew across the overlap with a zigzag set to about 3 mm wide and 1.5 mm long, twice, at each end of the overlap. A box stitch, meaning a rectangle with an X through it, is even stronger and worth the extra thirty seconds on adult garments.
Test the join by pulling it hard before you let it back inside. If it is going to fail, you want it to fail now.
Step 5: close the gap and spread the gathers

Pull the elastic fully inside, stitch the 2 inch gap closed along the existing seam line, and then work the gathers around the whole waistband with your fingers until they are even. Sewing the gap shut while the gathers are bunched to one side will lock the bunching in permanently.
Method 2: exposed elastic, stitched on

Faster, and the finish is a design choice rather than a compromise. Cut the elastic to your waist measurement minus 2 inches, then divide both the elastic and the waist opening into quarters and mark them with pins.
With the elastic on the right side of the fabric for a visible band, or the wrong side for a hidden one, match the four pins and pin between them, stretching the elastic to fit each quarter. Sew with a zigzag, 3 mm wide, 2 mm long, close to the elastic’s edge, stretching as you go and letting the machine feed. Then fold the elastic to the inside and topstitch the lower edge through all layers with a straight stitch, which buries the raw fabric edge.
The one rule: never sew through the body of braided elastic with a straight stitch. The needle cuts the rubber threads and the band gives out months later, usually at the worst moment.
Method 3: a knit waistband on stretch fabric

For leggings, knit skirts and lounge pants you want ribbing or a stretch jersey band, not flat elastic. Cut the band to about 85% of the waist opening measured along the seam line: for a 32 inch waist opening that is roughly 27 inches, plus seam allowance. A 4 inch deep band is standard for adults; 2 1/2 inches for children.
Sew the band into a loop, fold it wrong sides together, and quarter both the band and the garment opening. Sew the band to the opening with a ballpoint needle, size 75/11, using a narrow zigzag or a stretch stitch at 2.5 mm, stretching the band to fit each quarter as you go. Then press the seam allowance up towards the band and topstitch if the pattern calls for it.
Knit bands look wrong in one specific way: they are cut too long. If your band stands away from the body or ripples, it was not undersized enough, and the fix is to unpick and take out another inch rather than to add more elastic.
Getting the gathers even

Even gathers are a matter of markers, not skill. Mark the waistband into quarters before you thread, with pins at each quarter point, and mark the elastic the same way with a marker. When you join, match the marks. Then, after closing the gap, pull the fabric around the elastic in both directions with your thumbs until the fullness spreads outward from the join in both directions.
If the garment is long and heavy, such as a full skirt, add two more marks to make eighths. Four points on a 60 inch hem will still leave you with clumps.
Four out of five waistband failures trace back to one number: the casing being more than a quarter inch wider than the elastic.
Five common mistakes and how to fix them
- The waistband rolls over. Either the elastic is too narrow for the weight of the fabric, or the casing is more than 1/4 inch wider than the elastic so the band has room to flip. Go up one elastic width and remake the casing snug.
- The elastic twists inside the casing. The join was sewn before the loop was checked, or the casing is too wide. Thread again, straighten the band by running it between finger and thumb the whole way round, then join.
- The join pops. Braided elastic stitched with a straight stitch, or one row of zigzag instead of two. Overlap 1 inch and use a box stitch.
- The waistband is too tight. The elastic was cut to the body measurement without the subtraction, or measured over clothing. Open the join, add an inch, rejoin.
- The gathers clump. No quarter marks, or the gathers were spread after the gap was closed. Unpick the gap, spread, resew.
Finishing tips that make it look bought
Understitch the seam allowance to the casing before you close the gap, so the fold sits flat and the inside edge does not show when the garment hangs. Leave the join at the back, never at a side seam. And press the finished waistband over a sleeve board or the end of the ironing board rather than flat, so you press the curve it actually holds. Do not iron directly on elastic: low heat, a pressing cloth, and no steam held against the band.
If you are making the garment from scratch, the waistband is the last thing to fit, not the first. Baste the side seams, try it on, then cut the elastic. The gathered elastic waist skirt is the clearest project for practising this order end to end.
Frequently Asked Questions
What width of elastic should I use for a waistband?
For an adult garment, 3/4 inch to 1 inch. Heavier fabrics such as denim or canvas need 1 inch or wider to stop the band rolling; light cottons and children’s clothes work at 1/2 inch to 3/4 inch.
How much shorter than my waist should the elastic be?
Two inches shorter for woven or non-roll elastic, three inches for knit elastic. Always test the loop around your body before cutting, because the same nominal width from two brands can behave differently.


Can I sew an elastic waistband with a straight stitch?
Yes for the casing itself, which does not stretch, and no for the join, which must be zigzag or a box stitch. A straight stitch across elastic cuts the rubber threads and the band fails within months.
How wide should the casing be?
The elastic width plus 1/4 inch of ease, then add 1/4 inch for the turn under. For 1 inch elastic that means a 1 1/4 inch fold.
How do I stop the elastic twisting as I thread it?
Keep the band flat between finger and thumb the whole way round, pin the far end to the garment so it cannot vanish inside, and check the loop is straight before sewing the join.
Can I replace the elastic in a ready-made garment?
Yes. Open a few inches of casing at the back seam with a seam ripper, pull the old elastic out, thread the new band through, join it and close the gap.
About This Guide
This guide was written and tested by Mithu, who sews the samples for every tutorial on Craftsing and works the methods end to end on a domestic machine before they are published. The elastic lengths, casing depths and stitch settings here were checked against four independent sewing references and against a test garment sewn for this revision. Where sources disagree, the guide says so and gives the version that held up in the sample.