In the ever-evolving fashion world, few elements, like the humble elastic waistband, have stood the test of time. Mastering this detail can be a game-changer for sewists, as it provides a seamless combination of comfort and style. This seemingly minor detail is essential and should not be overlooked. If you are someone who enjoys sewing, then knowing how to sew elastic waistbands can be a valuable skill to have. It does not matter if you are a beginner or an experienced sewer; learning this skill can help you take your sewing abilities to the next level.
Why Elastic Waistbands are a Savvy Sewist’s Best Friend?
Comfort and Versatility
Have you ever slipped into a garment with an elastic waistband and experienced that blissful feeling of unrestricted ease? Elastic waistbands offer a harmonious blend of comfort and versatility, making them a sewist’s best friend. Whether you’re crafting casual loungewear or tailored formalwear, these stretchy marvels provide the flexibility to accommodate your body’s natural fluctuations, ensuring a perfect fit every time.
Flattering Silhouette
Contrary to popular belief, elastic waistbands are not just for cozy days spent lounging around. They can create a sleek, streamlined silhouette that flatters your figure when incorporated thoughtfully. The gentle cinching effect of an elastic waistband can accentuate your waistline, while the stretchy nature eliminates any unsightly bulges or constriction. Embrace the art of sewing elastic waistbands, and you’ll unlock a world of fashionable possibilities that seamlessly blend comfort and style.
Preparing for the Project
Gathering Supplies
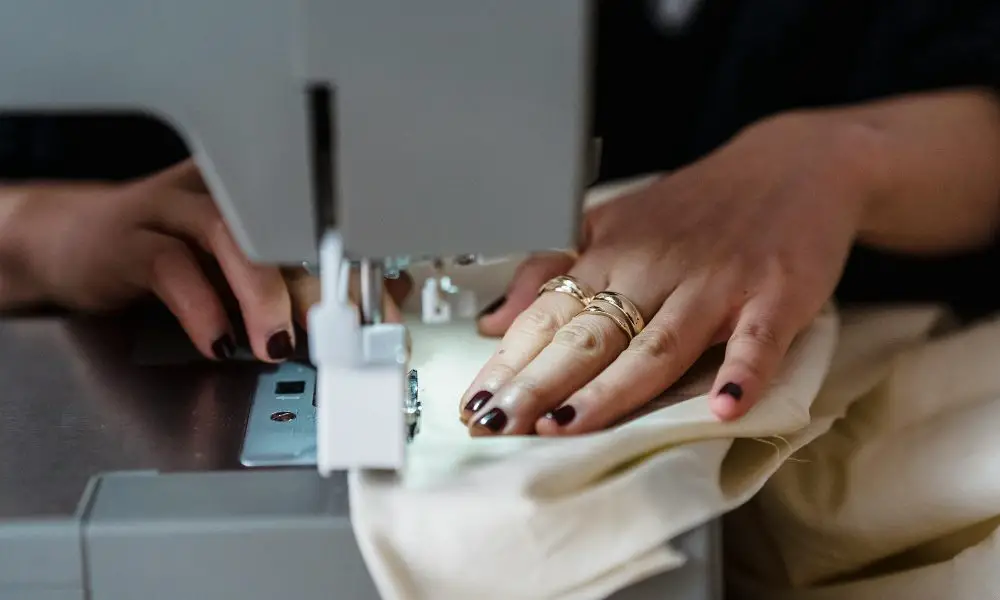
Before you embark on your elastic waistband adventure, gather the essential supplies. You’ll need your chosen fabric, a high-quality elastic band, a trusty sewing machine, thread, scissors, and additional notions like a seam ripper or fabric chalk. Ensure your sewing machine is in prime condition, with a fresh needle and properly wound bobbin, to avoid hiccups.
Choosing the Right Elastic
Choosing the fitting elastic is crucial for the success of your project, as not all elastics are equal. Consider the width of the elastic, as it should complement your garment’s desired look and functionality. A wider elastic band might better suit a casual, relaxed aesthetic, while a narrower option can create a more tailored, sophisticated appearance.
Additionally, measure your waist accurately to determine the correct elastic length. A general rule of thumb is to cut the elastic band to approximately 80-90% of your waist measurement, allowing for a comfortable stretch without excessive tightness or sagging.
Step-by-Step Instructions
Measuring and Cutting
Precision is critical when sewing elastic waistbands. Begin by measuring your waist accurately, ensuring a snug but comfortable fit. When cutting your fabric and elastic, allow for a generous seam allowance, typically 1/2 inch to 1 inch, to accommodate any slight variations and ensure a flawless finish.
Sewing the Elastic Waistband
Creating the casing for your elastic waistband is a crucial step. Follow your pattern instructions or utilize the time-honored technique of folding over the fabric’s top edge and stitching a parallel line, leaving a gap for inserting the elastic. Carefully feed the elastic through once the casing is ready, using a safety pin or bodkin for easier maneuvering.
When you’ve reached the end, overlap the elastic ends slightly and secure them with a few parallel rows of stitching, ensuring a sturdy and seamless joint. Gently distribute the elastic’s stretch evenly around the waistband, and you’re ready for the next step.
Attaching the Waistband

Encasing the raw edges of your fabric within the waistband creates a professional finish and prevents any unsightly fraying. Follow your pattern’s instructions or opt for the classic method of folding the fabric’s raw edge inward and topstitching the waistband, securing it with precise, even stitches.
Consider topstitching along the waistband’s top and bottom edges for an extra touch of finesse. This simple technique adds a polished, tailored look to your garment, elevating it from ordinary to extraordinary.
Alternative Methods
Expand your sewing repertoire by exploring alternative techniques for creating elastic waistbands. The exposed elastic waistband, for instance, offers a stylish and modern twist, showcasing the elastic band as a design element. This method is particularly striking when paired with sleek, minimalist designs or bold, contrasting color combinations.
Alternatively, the channeled elastic waistband technique involves creating a casing within the garment’s waistline, allowing the elastic to glide smoothly and invisibly through the channel. This method is ideal for achieving a seamless, streamlined look, particularly in more formal or tailored garments.
Tips and Tricks for a Flawless Fit
Adjusting Tension and Stitch Length
Mastering the art of sewing elastic waistbands often involves fine-tuning your sewing machine’s settings. Adjust the tension and stitch length to achieve the perfect balance of stretch and durability. A slightly looser tension and longer stitch length can accommodate the elastic’s movement, preventing unsightly puckering or thread breakage.
Stabilizing Stretch Fabrics
Stabilizing the fabric’s edges can be a game-changer when working with stretch fabrics, such as knits or jerseys. Consider using lightweight fusible interfacing or stay tape along the waistband area to prevent excessive stretching and maintain a crisp, polished appearance.
Pattern Adjustments for the Perfect Fit
Everybody is unique; sometimes, even the most meticulously drafted patterns may require slight adjustments. Don’t be afraid to embrace the art of pattern alterations, whether it’s adjusting the waistband’s length or modifying the rise to achieve the ideal fit. Personalization is the key to transforming a garment from ordinary to extraordinary, ensuring it flatters your figure flawlessly.
Styling Your Elastic Waistband Creation
Casual Chic
Not only are elastic waistbands suitable for loungewear, but they can also bring an air of ease and sophistication to your everyday outfits. Pair a breezy, elastic-waist skirt with a crisp button-down shirt and slip-on sneakers for a laid-back yet polished look. Alternatively, elastic-waist pants or shorts can be dressed up with a sleek blouse and statement accessories, blurring the lines between comfort and sophistication.
Formal Finesse
Don’t underestimate the power of an elastic waistband in formal settings. A well-fitted dress or skirt with a skillfully hidden elastic waistband can offer a great blend of fashion and ease, letting you move gracefully and confidently all night long. Complement your look with elegant accessories and a tailored blazer for a touch of refinement.
FAQs
What is the best type of elastic for a waistband?
The best type of elastic depends on the fabric and desired stretch. Non-roll elastic or woven elastic works well for woven fabrics, while knit or lingerie elastic is ideal for stretch fabrics.
How do I determine the right length of elastic for my waistband?
Measure your waist and cut the elastic to 80-90% of that measurement. The elastic should have some stretch but not be overly tight or loose.
Can I sew the elastic waistband with a regular straight stitch?
While a straight stitch can work, it’s recommended to use a stretch stitch or a narrow zig-zag stitch to allow for some flexibility in the stitching when the elastic stretches.
How do I prevent the elastic from twisting while sewing?
To prevent twisting, ensure the elastic is evenly distributed and not twisted before inserting it into the casing. You can also use a few pins to hold the elastic as you sew.
Should I topstitch the waistband after attaching it?
Topstitching the waistband is optional but recommended, as it gives a professional finish and helps keep it in place.
Can I sew an elastic waistband on a skirt or dress without a casing?
You can use the exposed elastic waistband technique, where the elastic is sewn directly onto the garment’s waistline to create a decorative feature.
In the ever-evolving world of fashion, mastering the art of sewing elastic waistbands is a skill that will serve you well. From casual chic to formal finesse, these stretchy marvels offer a versatile canvas for creativity. Will curiosity conquer all? Share your elastic waistband creations and styling tips in the comments below and inspire fellow sewists on their journey to sartorial perfection.
***
Main image: pexels


