Have your pants been feeling a bit too long? No need to worry – hemming them on a sewing machine is a quick and easy fix. This guide will walk you through the simple steps to get your pants perfectly tailored.
- Measure, mark, and cut the excess fabric
- Prepare the hem by pressing and pinning
- Set up your sewing machine for hemming
- Stitch the hem, maintaining an even fold
- Finish with a clean, professional-looking edge
Understanding the Basics
What is hemming?
Folding and stitching the unfinished edge of a clothing item is known as hemming. This process aims to give the garment a tidy and polished appearance. It not only enhances the appearance of your pants but also prevents the fabric from fraying or unraveling over time.
Benefits of hemming pants
- Achieves the perfect pant length, tailored to your specific measurements
- Gives your pants a polished, professional look
- Extends the lifespan of your garments by preventing fabric damage
Tools required for hemming pants with a sewing machine
- Sewing machine (of course!)
- Matching thread
- Hand-sewing needle (for basting or slip stitching)
- Scissors or seam ripper
- Pins or clips
- Iron and ironing board
- Measuring tape
- Fabric chalk or pencil
Step-by-Step Guide
Now that you have the fundamentals down let’s delve into the systematic approach to sewing machine hemming for pants.
Preparing the Pants
Before you begin, it’s essential to try on the pants and mark the desired length. Fold the pant leg to the new size and use a fabric chalk or pencil to mark the hemline. Once marked, press or iron the existing hem to create a crisp fold.
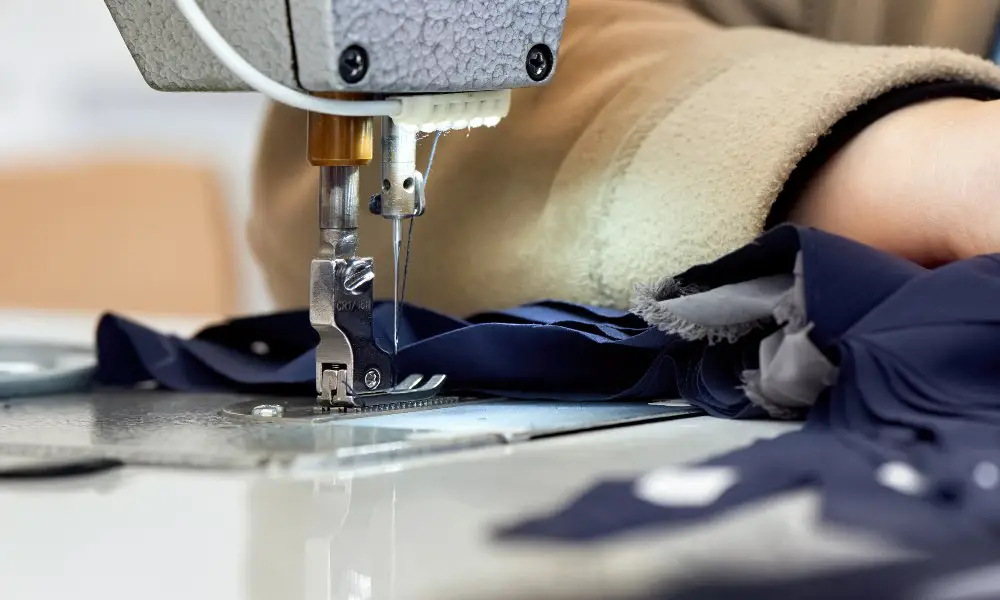
Setting up the Sewing Machine
Choose a thread color that matches your pants and thread your sewing machine accordingly. Choose the right needle size that corresponds to the type of fabric you are using. Adjust your machine’s tension and stitch length settings – a shorter stitch length (around 2-2.5) is ideal for hemming.
Marking and Pinning the New Hem

Measure the desired hem allowance (typically 1-2 inches) from the marked hemline and make a new line parallel to the original hem. Pin along this line, folding the excess fabric underneath to create the new hem.
Stitching the New Hem
You have two stitching options: a straight stitch or a blind hem stitch. The straight stitch is more visible but more accessible to execute, while the blind hem stitch is nearly invisible from the right side but requires more skill.
For a straight stitch:
- Position the folded hem under the presser foot, aligning the edge with the seam allowance guide.
- Stitch along the folded edge and backstitch at the start and end for reinforcement.
- Trim any excess fabric from the inside of the new hem.
For a blind hem stitch:
- Fold the hem again, enclosing the raw edge within the fold.
- Position the fold so that the needle catches the folded edge while creating a series of stitches on the right side of the fabric.
- Ensure that the stitches are invisible or barely visible on the right side.
- Pressing and Finishing Touches
Once stitched, press the new hem flat to create a crisp, polished look. For an added touch, you can use hem tape or weight to help the hem hang nicely.
Tips and Tricks
Dealing with different pant fabrics
Different fabrics may require needle size, stitch length, and tension adjustments. For example, heavier fabrics like denim or twill may need a heavier needle and longer stitch length, while delicate fabrics like silk or chiffon may call for a finer needle and shorter stitch length.
Hemming pants with cuffs or pleats
You must adjust the hemming process if your pants have cuffs or creases. For cuffed pants, you may need to remove the existing cuff before hemming and reattach it after the new hem is in place. For pleated pants, maintain the pleat lines when folding and pinning the new hem.
Troubleshooting common hemming problems
- Puckered or uneven hems: Adjust the tension on your sewing machine or use a stabilizer fabric.
- Skipped stitches: Check your needle for any burrs or damage, and ensure it’s the correct size for your fabric.
- Fabric shifting: Use plenty of pins or clips to keep the fabric from shifting while sewing.
FAQs:
Can I hem pants without a sewing machine?
You can hem pants by hand sewing, but it’s more time-consuming. A sewing machine makes the process quicker and gives you a more professional-looking finish.
How do I know the proper hem allowance?
The standard hem allowance for pants is usually 1-2 inches, but it can vary depending on your preference and the pants’ style. It’s best to try on the pants and mark the desired length before hemming.
What if my pants have a kick pleat or slit at the bottom?
When hemming pants with a kick pleat or slit, make sure to transfer the pleat or slit to the new hem. Carefully fold and pin the pleat or slit before stitching the new hem.
Can I hem pants without cutting off the excess fabric?
Yes, you can use a blind hem stitch or a catch stitch to hem pants without cutting off the excess fabric. This technique is often used for temporary hems or when you want the option to adjust the length later.
Conclusion
Embrace your sewing prowess – you’ve just conquered the art of hemming pants! With this newfound skill, you can now tailor your pants to perfection, ensuring a flawless fit and a polished look. But remember, practice makes perfect. What other sewing techniques would you like to master next? Share your hemming triumphs and sewing aspirations in the comments below!
***
Main image: freepik