Have you ever found yourself utterly bewildered while attempting to thread your faithful Kenmore sewing machine? If so, you’re not alone! Threading a sewing machine can be a perplexing process, especially for novice sewing enthusiasts. Do not worry; this all-encompassing manual will simplify the complexities of threading your Kenmore, allowing you to overcome this long-standing difficulty with complete assurance.
The Paramount Prelude
Before we delve into the intricate threading process, let’s address the fundamental prerequisite: gathering the essential materials. Ensure you have a fresh spool of high-quality thread that complements your project’s fabric. Additionally, please familiarize yourself with your Kenmore model’s manual, which may contain specific instructions tailored to your machine.
Unraveling the Process
Unveiling the Upper Path
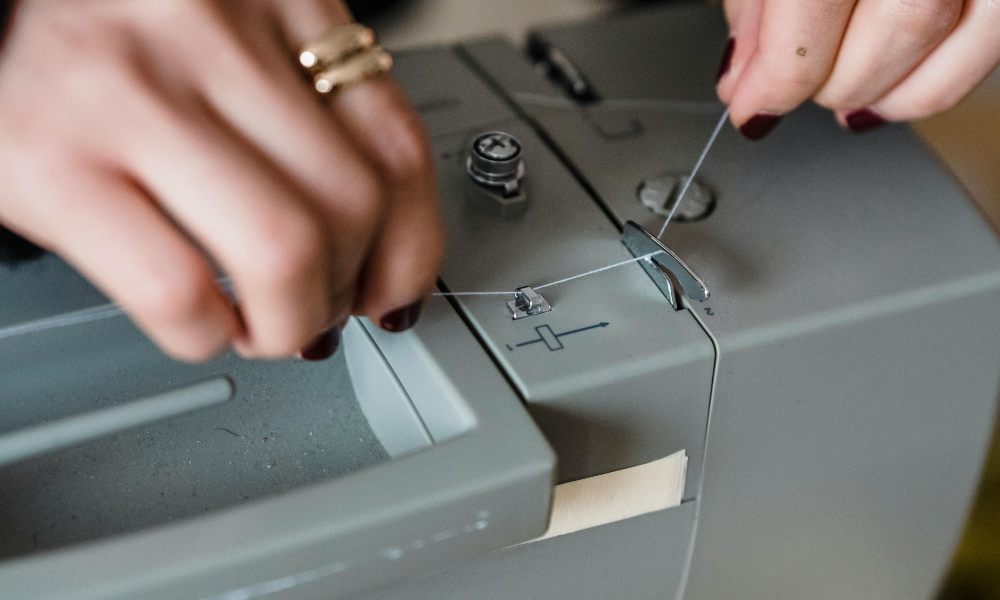
Commence by raising the presser foot, automatically lifting the tension discs, allowing seamless thread passage. Next, secure the thread spool onto the pin, ensuring it unwinds smoothly. Guide the upper thread through the uppermost guide, typically a hook or eyelet near the spool pin.
Continue routing the thread through the remaining guides, meticulously following the path illustrated in your manual or the machine’s thread guide diagram. Pay close attention to the thread’s passage through the take-up lever, a vital component that controls the upper thread’s tension and movement.
The Bobbin’s Underground Odyssey
While the upper thread’s journey is undoubtedly intricate, the bobbin thread’s path is no less complex. Begin by placing the bobbin in its designated case, ensuring the thread unwinds clockwise. Guide the bobbin thread through the tensioning spring and the delivery eye, allowing it to emerge through the slot in the bobbin case.
With the bobbin prepared, gently lower it into the bobbin area, aligning it with the bobbin case positioning guide. Secure the bobbin case, and you’ve successfully navigated the bobbin thread’s underground odyssey.
Mastering the Tension Tango
The Pivotal Balance
Achieving the perfect tension balance is crucial for producing impeccable stitches. While your Kenmore sewing machine comes with pre-set tension values, you may need to adjust them based on your project’s fabric type and thread weight.
Experiment with the tension dials, gradually increasing or decreasing the tension until you achieve a harmonious balance between the upper and bobbin threads. A well-balanced tension will result in stitches that are neither too loose nor tight, lying flat and evenly on both sides of the fabric.
Correcting Course
If you encounter tension issues despite your meticulous adjustments, don’t despair. Several factors, such as thread quality, needle size, and fabric thickness, can contribute to tension challenges. Consult your manual for troubleshooting tips or seek guidance from experienced sewists in online communities or local sewing circles.
Periodic Maintenance: A Stitch in Time

Brushing Away Lint
As time passes, the accumulation of lint and debris can impede the performance of your Kenmore sewing machine and might lead to thread breakages or skipped stitches. Regularly brush away any visible lint from the bobbin area and needle plate, and feed dogs using a soft-bristled brush or compressed air.
Oiling the Well-Oiled Machine
Proper lubrication ensures your Kenmore sewing machine operates smoothly and extends its lifespan. Consult your manual for guidance on oiling specific points within the machine, using only the recommended lubricant. Avoid over-oiling, as excess oil can attract lint and potentially stain your projects.
For the Seasoned Quilter
Unleashing Advanced Stitches
As your sewing skills evolve, you may wish to explore the vast array of decorative and utility stitches your Kenmore sewing machine offers. Consult your manual to learn how to select and adjust these stitches, unlocking creative possibilities for embellishments, appliqués, and intricate quilting patterns.
Embracing Presser Foot Possibilities
Presser feet are versatile accessories that can revolutionize your sewing experience. These ingenious tools can simplify intricate techniques and add a professional flair to your projects, from specialized quilting feet to zipper feet and even cold feet. Experiment with different presser feet to expand your sewing repertoire and elevate your creations.
Unsnarling Common Stumbles
Knotty Thread Troubles
Thread tangles and knots can be frustrating hurdles in the sewing process. If you encounter this issue, resist the temptation to pull forcefully, which may break the thread or damage the machine. Instead, carefully snip the knotted area and re-thread the machine, ensuring the thread follows the correct path without snags or twists.
Reinserting the Gone Astray Needle
Needles can sometimes become dislodged or bent during sewing, leading to skipped stitches or fabric damage. If such a situation arises, you should remove the needle safely. To do so, lower the presser foot and rotate the hand wheel towards you. Raising the needle to its highest position will allow you to safely remove it. Gently reinsert a new needle, ensuring it is fully inserted and secured in the needle clamp.
The Vintage Kenmore Conundrum
Timeless Treasures
Vintage Kenmore sewing machines hold a special place in the hearts of many sewists. These iconic machines, often passed down through generations, are cherished for their durability, reliability, and nostalgic charm. If you possess a vintage Kenmore, embrace its unique quirks and celebrate its enduring legacy.
Resurrecting Classic Workhorses
With meticulous attention and persistence, vintage machines can be restored to their original condition, despite requiring extra care. Find reputable repair services or online forums dedicated to vintage sewing machine restoration. With the proper guidance, you can breathe new life into these timeless workhorses, ensuring they continue to create beautiful projects for years to come.
FAQs:
Can I use any type of thread in my Kenmore sewing machine?
It’s recommended to use high-quality thread designed for sewing machines to ensure smooth operation and avoid potential jams or breakages. Consult your Kenmore manual for the recommended thread types and weights.
How often should I clean my Kenmore sewing machine?
Regular cleaning is crucial to prevent lint buildup and ensure optimal performance. Aim to brush away lint from the bobbin area, needle plate, and feed dogs after each project or whenever you notice an accumulation.
My vintage Kenmore sewing machine is having issues. Can it be repaired?
Absolutely! Many vintage Kenmore models can be restored to their former glory with the help of reputable repair services or knowledgeable enthusiasts in online forums. Don’t give up on your timeless treasure just yet.
I’m struggling to achieve perfect tension on my Kenmore. What could be the issue?
Tension troubles can stem from various factors, such as thread quality, needle size, fabric thickness, or improper threading. Consult your manual for troubleshooting tips, and don’t hesitate to seek guidance from experienced sewists.
Embark on Your Sewing Expedition
Now that you’ve mastered threading your Kenmore sewing machine, what wondrous creations will you bring to life? Keep in mind that the more you practice, the better you become at it. Repetition is essential for mastery, and every completed task enhances your skills further. So, grab your trusty Kenmore, a bountiful supply of thread, and let your creativity soar! What new sewing adventure awaits you?
***
Main image: pexels


