Have you ever experienced frustrating tension issues with your Singer sewing machine? Dealing with skipped stitches, uneven stitch formation, and puckered seams can try any sewist’s patience! Often, singer sewing machine bobbin tension problems are the culprit behind these annoying sewing machine headaches.
Understanding how to adjust and troubleshoot your Singer machine’s bobbin tension can help you restore balance and achieve the beautiful, even stitches you desire. Read on as we unravel the mysteries of bobbin tension and conquer those pesky problems for smooth sailing through your next sewing project.
What is Bobbin Tension?
Bobbin tension refers to the amount of pressure applied to the bobbin thread as it is fed up through the needle plate to intersect with the upper thread. This tension is crucial in balancing the stitch formation by controlling how the bobbin thread integrates with the upper thread.
The bobbin tension dial or screw is located on the bobbin case inside the lower portion of the sewing machine. Turning this dial, adjust the tension discs and clutch the bobbin thread as it unwinds from the bobbin and rises to meet the upper thread.
Achieving the correct tension on the bobbin is crucial in ensuring that the top and bottom threads interlock between the layers of fabric, resulting in a balanced stitch. If the tension is not adequate, the stitch may be uneven and loose, with the underside having loops. Too much stress causes the bobbin thread to pull too tightly, leading to puckering, gathering, and uneven stitch length.
Adjusting Bobbin Tension

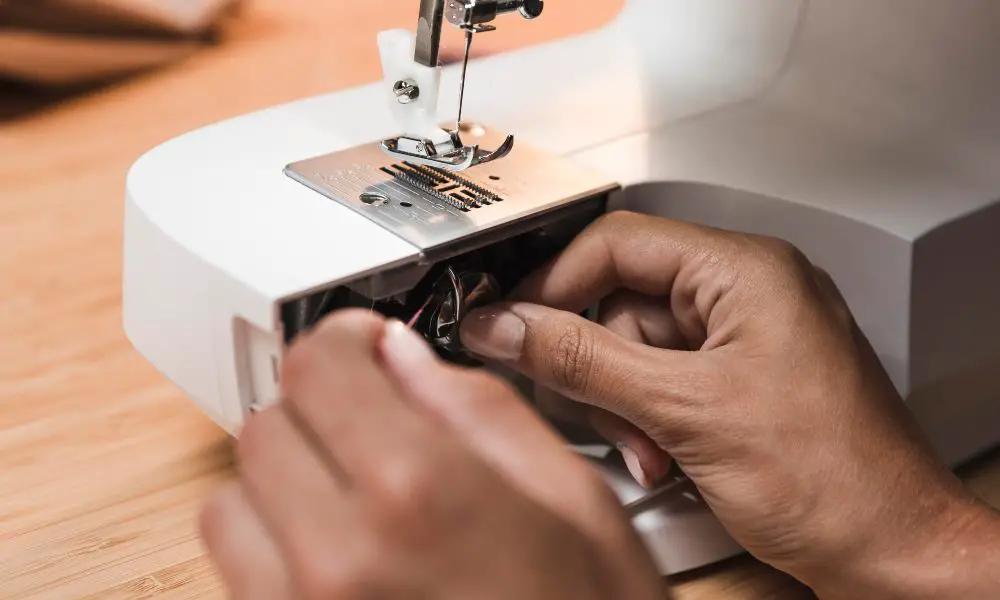
To locate the tension assembly, remove the bobbin case from the machine. The tension dial or screw is integrated into the case, often near the open end. Consult your Singer sewing machine’s manual for the recommended tension setting – usually between 12 and 18 on the dial.
Make minor adjustments incrementally, testing on scrap fabric between each turn of the dial. Turn clockwise to increase tension or counter-clockwise to reduce stress. If the dial lacks tension settings, adjust the screw in tiny increments using the flat edge of a small screwdriver.
Follow a systematic process when adjusting bobbin tension:
- Thread the bobbin case and machine correctly.
- Set the upper thread tension to the standard setting.
- Sew test stitches on scrap fabric, examining tension balance.
- If needed, turn the bobbin tension dial/screw and re-test.
- Repeat steps until the desired stitch balance is achieved.
Common Bobbin Tension Issues
Many stitch problems arise from improper bobbin tension:
- Skipped stitches – Bobbin tension is too loose, and the bobbin thread fails to interlock with the upper thread.
- Uneven stitch formation – Unequal tension causes irregular, imbalanced stitching.
- Puckering fabric – Bobbin thread is too tight, causing the fabric to gather.
- Thread nests on the underside – Too much tension creates knots of tangled thread.
Troubleshooting Tension Problems
When experiencing tension troubles, there are several steps to identify the cause and restore proper balance:
- Examine threads for fraying, knots, and uneven winding. Replace low-quality or damaged threads.
- Check and replace damaged or incorrect-size needles. Match size and type to fabric and thread.
- Using a brush and compressed air removes lint and debris from tension discs.
- Slowly re-thread the top and bobbin, ensuring the threads are seated correctly.
- Adjust tension dials through the entire range, testing on fabric. Return to the middle setting.
- Consult the manual for recommended tension settings for your fabric and thread.
- Make small turns of the bobbin tension screw, testing after each adjustment.
Achieving Proper Tension Balance
The key to beautiful, balanced stitches is finding an equilibrium between the upper thread tension and the bobbin tension. Remember that heavier threads and fabrics require higher tension settings.
Test tension balance on a scrap piece of the project fabric. Make moderate adjustments and re-test. Fine-tune the tension dials until the stitch formation looks smooth and even on both sides of the fabric.
Be patient and methodical when adjusting tension settings. With trial and error, you’ll learn the optimal tension balance for specific thread/fabric combinations. Remember to take notes!
FAQs
What are some common signs of bobbin tension problems?
Skipped stitches, uneven stitch length, puckered seams, and nests or looping on the underside of the fabric are signs of improper bobbin tension.
How do I adjust the bobbin tension on my Singer sewing machine?
Locate the bobbin case tension dial or screw. Make small, incremental turns while testing on scrap fabric until the desired balanced tension is achieved. Follow your manual’s guidelines.
What if adjusting the bobbin tension doesn’t fix the problem?
Check for issues like damaged or incorrect needles, lint in tension discs, improper threading, and poor-quality thread. Consult your machine’s manual.
How do I know if my upper tension needs adjusting, too?
Proper tension requires a balance between upper and lower threads. Adjust upper tension in concert with bobbin tension based on test stitches.
What’s the best way to learn how to set the correct tension?
Practice and take notes! Test different thread/fabric combinations and record the best tension settings.
Conclusion
We’ve covered a lot of territory on the intricacies of bobbin tension. Here are some essential tips to help tame tension problems with your Singer sewing machine:
- Understand the role of balanced tension between top and bobbin threads.
- Check for debris and damaged parts that can impact tension.
- Make small, incremental turns of the tension dials.
- Always test settings on scrap fabric.
- Note thread/fabric/tension combinations that produce quality stitches.
You’ll gain confidence in mastering your machine’s tension system with diligent testing and fine-tuning. What tips and tricks have helped you troubleshoot bobbin tension problems on your Singer sewing machine? Happy Stitching!
***
Main image: freepik